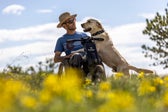
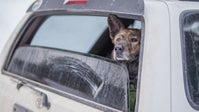
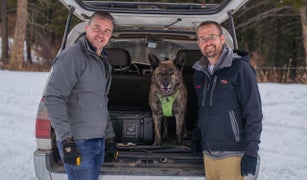
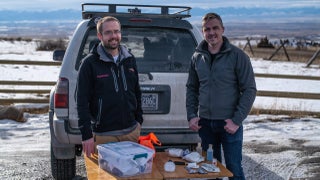
WES SILER: Dog first aid is a lot like human first aid. You don't need to overthink it. But there are some important differences. And we're here with Joe Spoo, sporting dog veterinarian, and we're going to show you the three most common dog injuries and how to treat them, and hopefully that's going to sort of illuminate overall dog first aid for you.
[MUSIC PLAYING]
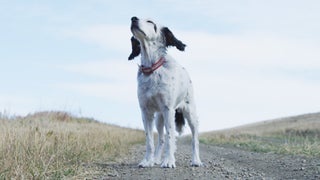
[HOWLS]
So where we starting?
JOE SPOO: So I think let's start at the eyes because it's going to be the first thing that you look at after you do that tail, gait exam that we went over in one of the earlier videos. And so the big thing with the eyes is if you think about how sensitive they are-- if you get an eyelash on your eye, it hurts like hell.
WES SILER: Yeah.
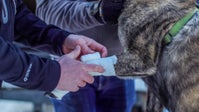
JOE SPOO: And so if you think about that, we want to avoid the actual colored portion of the eye. And so stay away from the cornea. And so with these guys, what we're going to look at is down in that little pocket, and that's where you're going to most commonly see seeds and weeds. And so when you're rinsing it out with the saline, the big thing is-- so if there's a seed in that little pocket, we're going to take our saline, we're going to roll that eyelid down, and we're just going to flush it out. And you can't overdo it. Kind of the joker, the little saying in veterinary medicine is dilution is the solution to pollution. So just flood that eye out. So roll that pocket--
WES SILER: And it is like a kangaroo pocket in there.
JOE SPOO: It is.
WES SILER: I can see something really getting trapped in there really easily.
JOE SPOO: Absolutely. And the other way to kind of get more visualization there is if, through this upper eyelid, you actually just a little bit of pressure on his eyeball, it pulls that third eyelid up, and you can see more of that pocket down in there.
And so, ideally, if you have two people, one of you can be kind of manipulating the eyelids and the other person flushing. But shoot for the non-surface of the eye and you'll be fine. And don't be afraid to really flood that eye to kind of float those seeds or debris out.
So we're going to talk about paw injuries. And so the things that we'll see is a pad injury, a nail injury, or, with these really active dogs, sometimes a wrist injury. And so we're going to clean them up, if it's a cut, we'll flush it, and then we'll talk about wrapping it. Whether it's a cut or it's a wrist injury, we're going to wrap it very similarly.
OK, so we got a couple different things here. If we have a dog that's got a cut or a deeper wound, we're going to use our wound flush or our medicated flush to flush it out. If we have a crack or a cracked nail, we can use our glue, and then it's a matter of wrapping it to cover it up. And so if we have a big kind of wound on it, we're going to use the non-stick pad. If it's more of a road rash, we can use the 4-by-4 gauzes.
The big thing when wrapping a paw or the wrist is to make sure you start at the toes and go up because you don't want to start up here and cut the blood supply off, and then you'll have this paw that swells up. And so let's pretend that we have a cut on the top of the pad. I'm going to cover it up.
And then two options-- one, you can use the cling or the cotton. And so if it was a wrist injury, I'm going to use the padded cotton and wrap above the wrist. We just rip that off, and then we'll take the cling wrap.
And so if it was just a cut as opposed to an injury, we would just use this cling wrap to go over the area. And again, with that cotton under there, you can put a fair amount of pressure, but you don't want to tourniquet the leg off. You just want to basically hold your bandage material.
And then we do the over wrap with the vet wrap or the cling wrap. The big thing, too, is you want to leave two toes out so that you can see if those swell up and we're having any issues there. And this stuff, you don't want to, again, cinch it down, but you want it tight enough that it's going to hold everything in place and not wrap too tight.
And there you have it. Very quickly, we've addressed if we had a pad cut, a laceration, or if we had a sprained wrist. We've very quickly addressed all of those with one simple wrap.
So the next common thing that we'll see is a laceration-- so if we have a dog that jumped over a fence, ran into a stick-- and so kind of two ways that I deal with those in the field and kind of based on your comfort level and then the depth of it. So let's say he ran into a barbed wire and we have a big cut on his side.
And so the big thing with dogs is you want to get the hair out of the way, and that's one of the big differences between you and I. We don't have all this fur that's going to carry bacteria and dirt and debris. And so if you can, use a clipper or something to remove that hair, or, the other thing that you can do, flush the wound out with your saline or your wound flush, and then you can take the triple antibiotic ointment, or any type of Vaseline type of product, and mat that hair away.
And then the two things-- one, if you're comfortable using your surgical stapler, bring those edges together and pop a couple staples in. Typically what I recommend is starting at the middle because you're going to use less staples, right? So if I start at the end, I don't know how many to use. But if I bring that middle together in start, I can then kind of reduce it. And something that may look like it needs 10 staple maybe will only need four.
The other option, if you're not comfortable with the stapler, would, again, be able to clean that area out, put the triple antibiotic in, and then you either use the big, white t-shirt or pile of these gauzes, and then, just like we did with the leg, you're going to wrap that in place until you get back to town and you're able to address it.
And just tight enough so the bandage is secure and not coming off and not cutting off circulation.
Correct-- and if it's on the body wall like that, making sure he can breathe. And so if you go all the way around the body-- that's the other thing I've seen people do is they tighten that down, and the dog's struggling to breathe, and then we wonder, is it deeper than I think or am I just constricting his chest?
WES SILER: OK. And I guess one big question for me is, if there's a cut or a laceration somewhere awkward, like on his head or on an ear, how do we address that?
JOE SPOO: So the ear is tough, and so the ear and the head bleed like crazy.
WES SILER: Yeah.
JOE SPOO: And so you're going to think your dog's dying. And so the biggest thing that I would say there is pressure. And so what the mistake a lot of people make is they'll take their gauze and they'll cover the ear and then they'll peek, and then they'll take the gauze, and then they'll peek. And every time you pull away, you're disrupting that clot-- and so just pressure until you're bored out of your mind and do pressure a little bit longer and then take a look and see. And oftentimes with just simple pressure with a surface wound, you're going to be fine.
WES SILER: All right, well, thank you very much, man. I feel really sort of more knowledgeable about this now. Yeah, I feel like I could go do this.
JOE SPOO: Perfect.
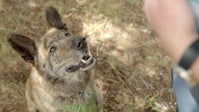
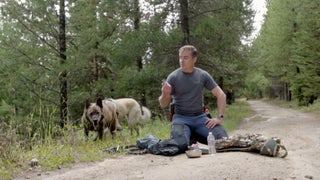
WES SILER: Yeah, thank you. OK, Wiley, it's all over. And so those are the three most common injuries your dog's going to face outdoors, and now you know how to address them. You carry the first aid kit we showed you in a previous video. Use it for this stuff, get your dog back, get your dog to the vet, and you're going to be OK.
JOE SPOO: Very good.
WES SILER: Awesome.