
New perk: Easily find new routes and hidden gems, upcoming running events, and more near you. Your weekly Local Running Newsletter has everything you need to lace up! .
Reprinted with permission from Penguin Random House and .
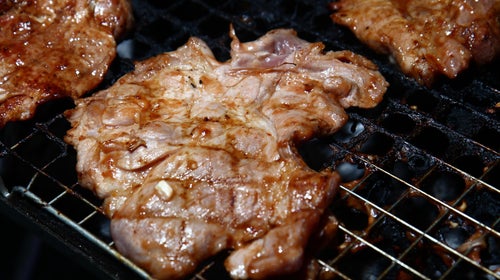
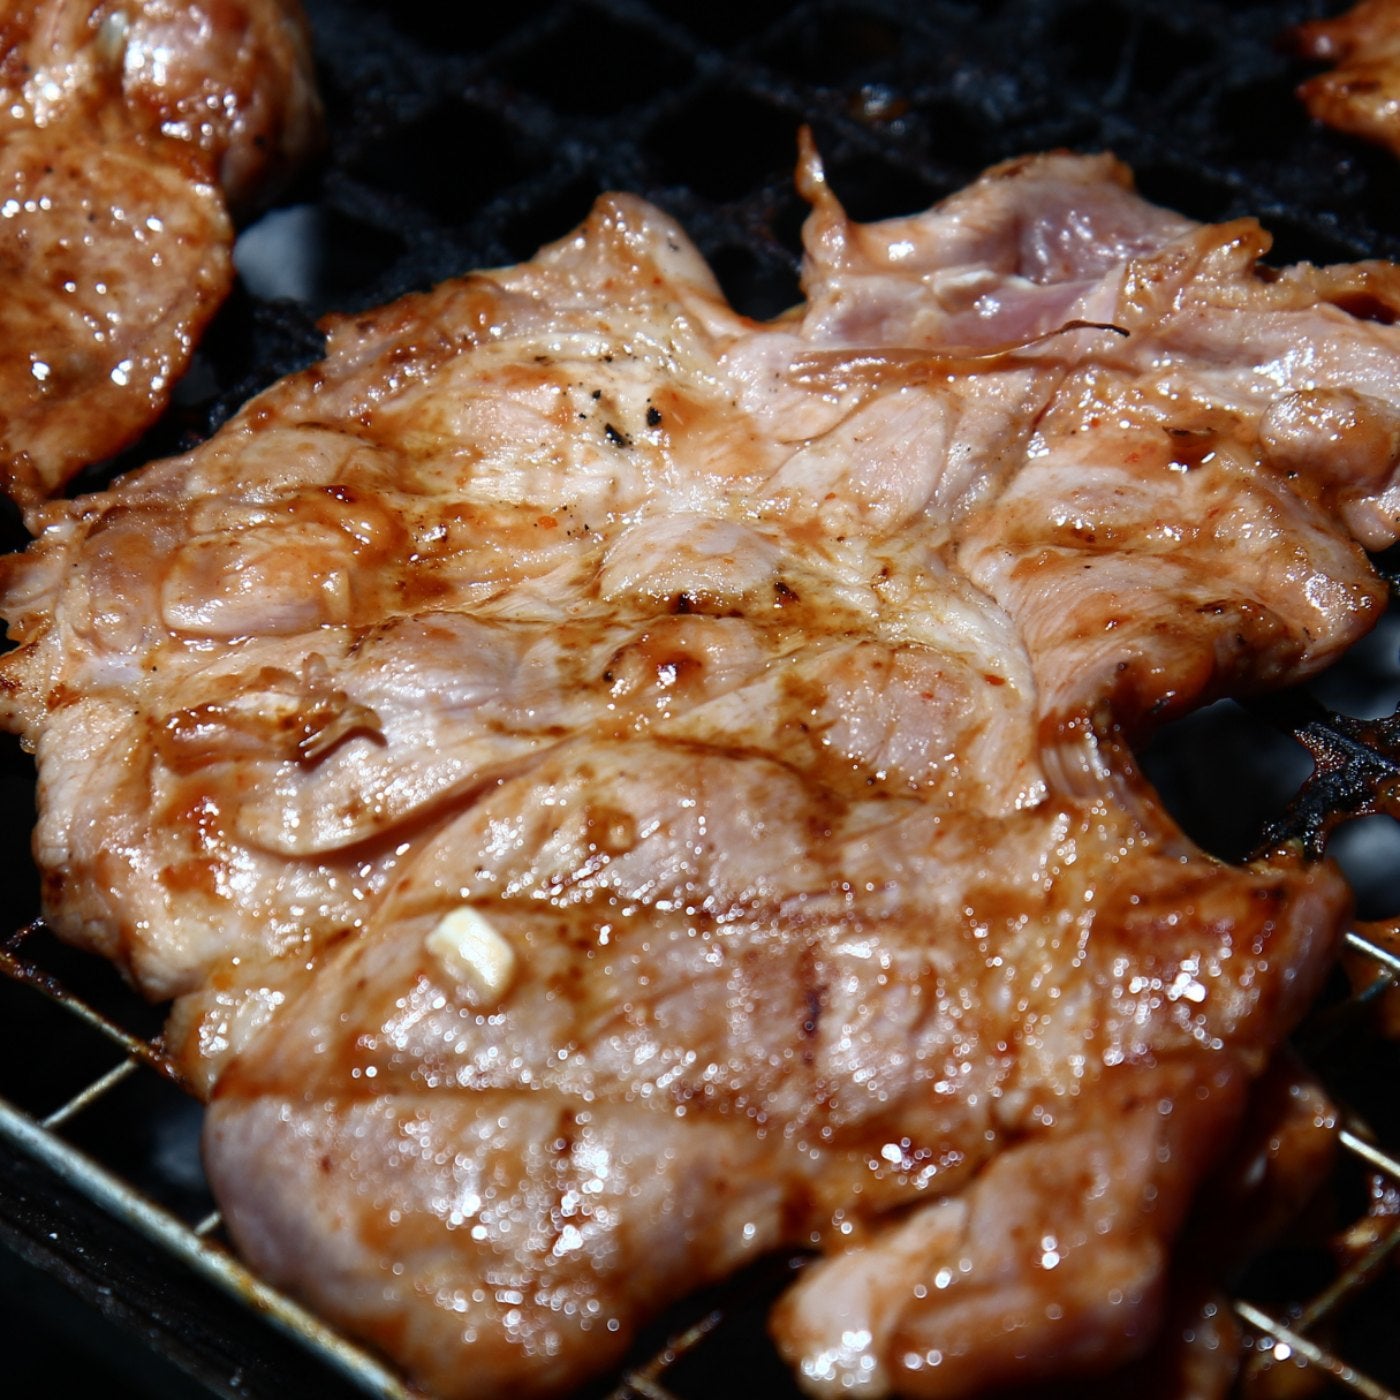
This preparation of pork combines the dynamics of a slow cook with the fast grill, producing a flavor that hearkens to both. Pork steaks absorb the delicious effect of the grill as their drippings vaporize on the hot coals and subsequently rise up to perfume the meat. Yet they also pick up gentle smoke from the coals and burning wood.
While this pork is cooked like a steak or a chop, it is actually cut from the shoulder, aka the pork butt. As you know, the meat from the shoulder is much tougher than meat from the loin, where the chops are. Consequently, pork shoulder is usually cooked long and slow to break down the collagen and make the meat pull-apart tender. The goal for this approach to shoulder steaks is to cook them over direct heat, like a pork chop, but slowly and deliberately so they soften a bit over time. You’re not looking for exceedingly tender, pulled-pork consistency here. But you’re also going to cook well past medium-rare as you might do for a chop. The length of the cook allows the meat to pick up precious flavor from the fire.
Speaking of pork chops, they would be equally delicious cooked over the firepit and basted with the mop recipe listed here, but they are an entirely different muscle—from the loin, not the shoulder—which cooks quite fast, should be served at a lower internal temperature, and doesn’t need all that time to break down tough muscle fiber. Cook thick-cut pork chops as you would a steak (though not as rare), but feel free to baste them with this mop for added flavor.
THE MEAT
I recommend using rich, well-marbled pork, as the fat content helps the meat hold up over a long cook. Definitely try to avoid modern, conventional pork, which has been purposely bred to be lean. I look for heritage breeds such as Berkshire or Red Wattle. There’s even a ranch raising Ibérico pigs in Texas, the same breed that produces the world’s greatest jamón in Spain.
Use a bone-in pork butt and ask your butcher to cut it into steaks two to three inches thick. You could also buy a whole shoulder (more affordable but also more work) and then break out the old bone saw, which I sometimes do much to Stacy’s chagrin (not her favorite thing to find lying around the kitchen), and cut through the bone yourself. Most of the steaks from a pork butt will have a sliver of the blade bone in them. This is what you want. Boneless butts have to be butterflied to get the bone out and then are tied up in a round. This is fine for roasting a whole piece, but the steaks need to retain their structural integrity and thus must retain the bone.
THE MOP
A mop is necessary here to add pork-friendly flavors and to keep the meat moistened so it doesn’t burn while it cooks for a good long while over the coals. The mop also provides additional fat that your pork might not have (even a well marbled heritage breed), augmenting the supply of vaporized juices as it drips onto the coals.
You can prepare the mop on the stovetop in advance and then warm it over the fire when it’s time to use. Doing this advance prep makes it easy to cook these steaks at home or at a campsite.
Ingredients
- 1½ pounds / 350g unsalted butter
- ⅓ pound / 150g thick-cut bacon, in one piece, cut into chunks
- 3 cups / 690g apple cider vinegar
- Peel of 1 orange
- Peel and juice of 1 lemon
- 15 to 20 garlic cloves, smashed (use the larger amount if you favor garlic)
- ½ yellow onion, coarsely chopped
- Grapeseed oil for the grate
Preparation
1. Liberally salt the steaks on both sides and set them on a baking sheet. Let the steaks air-dry, uncovered, in the refrigerator for at least 1 day or up to 2 days.
2. To make the mop: In a medium saucepan over low heat, combine the butter, bacon, vinegar, orange peel, lemon peel, lemon juice, garlic, and onion and warm until the butter melts, stirring occasionally. Keep the mop warm on the grate.
3. Build a firepit fire, burning down six to eight logs to create a nice coal bed, then maintain another couple of logs burning on the side to supply coals. When it’s time to start cooking, clear the burning logs off the coal bed so you have just coals to cook over. The logs can continue to burn on the side. Because of the length of time that these steaks cook, they are best done over a medium- to low- heat coal bed with the grate set eighteen to twenty-four inches above the coals. Oil the grate.
4. Remove the steaks from the fridge and lay them on the grate. Don’t temper the steaks, just put them on cold, as the first couple of hours are really about developing the exterior of the meat.
5. Since the steaks are going to cook in the open air for the next 1½ hours or so, set the fire to mellow and let ’em rip. Stand by with tongs and flip the steaks every now and then to develop a nice, rich crust. As the fire progresses, bring in fresh coals from the burning logs on the side and keep the meat moving so it never flames up. You want these steaks to be kissed by heat and the clouds of their own evaporations, not by flames.
6. After the first couple of flips, starting 15 to 20 minutes in or when you see the surface of the steaks beginning to dry out, start to mop to keep the surface moist. Gently drizzle the mop over the tops of the steaks. It will drip down and hiss in the coals, which is a good thing! Turn the steaks and mop the other side. Repeat this every 10 minutes or so as needed to keep the surface moist. Also, be careful with your mop—you need it to last the whole cook and then have some to put in the wrap, so go easy.
7. Now you’re about 2 hours in. Much as with brisket, you need your crust to get a little crustier than you ultimately want it because it will be softened after you wrap. When you’ve built a great crust, it’s time to wrap the steaks in aluminum foil. Have a foil sheet ready for each steak. Remove the steaks, place each one on a foil sheet, and pour a little bit of the mop over the top. Wrap each steak tightly in the foil and return the steaks to the fire for about 1 hour more.
8. Using a digital thermometer, test for doneness; the steaks are ready to remove from the heat when the thermometer inserted into the side of each at the middle reads about or just above 200°F. Allow the steaks to rest while you add some wood to replenish the coal bed. This could take 40 minutes to 1 hour.
9. Once your coals are back up and hot—or you’re simply ready to eat—unwrap the steaks and put them back on the grate to sizzle up the surface and regain your crust. Save the juices retained in the foil to pour over the sliced meat.
10. Remove the steaks from the fire and, when cool enough to hold, it’s time to slice and serve.