

The first time I went fly fishing, my buddy summed up the sport in five words: “hurling money into the river.” That definitely felt like the case as I proceeded to lose $10 worth of store-bought flies in two hours. One day, I ran out of flies almost immediately and felt too ashamed to bum one, so I continued to faux fish with nothing on the line. When a game warden pulled up to inspect our licenses and make sure our rigs were legal, I sheepishly mumbled something about practicing my casting. That was the moment I resolved to learn how to tie my own damn flies.
For my first attempt, I chose the —a grublike yarn body with a fluffy marabou-feather tail. I picked it because it’s the smaller, simpler sibling of the wooly bugger, which my local fly shop recommended for imitating small fish and big bugs (your local shop can help you determine which colors and fly patterns are best for your local waters and season). It was my gateway drug. Next I tied the —a killer bugger sans tail—which earned me a small trout when the water was running fast and muddy. Then, on a whim, I tried a riff on the killer bug, adding a feather tuft at the head to resemble legs or wings or whatever else a fish might imagine. I call it the killer buggle, a bug on its way to becoming a fancy-tailed killer bugger. To a trout, I thought, these might seem like leggy larvae or baby flies. I was not wrong: I’ve tied scores of these and made more catches with them than with all other flies combined. Five years later, I’m still filling my fly box with killer buggles because they’re a trifecta of effective, easy, and darn cheap—less than 30 cents each.
With just a few materials and tools, you can start making your own in no time. To get started, here’s everything you need and instructions for how to tie the killer buggle.
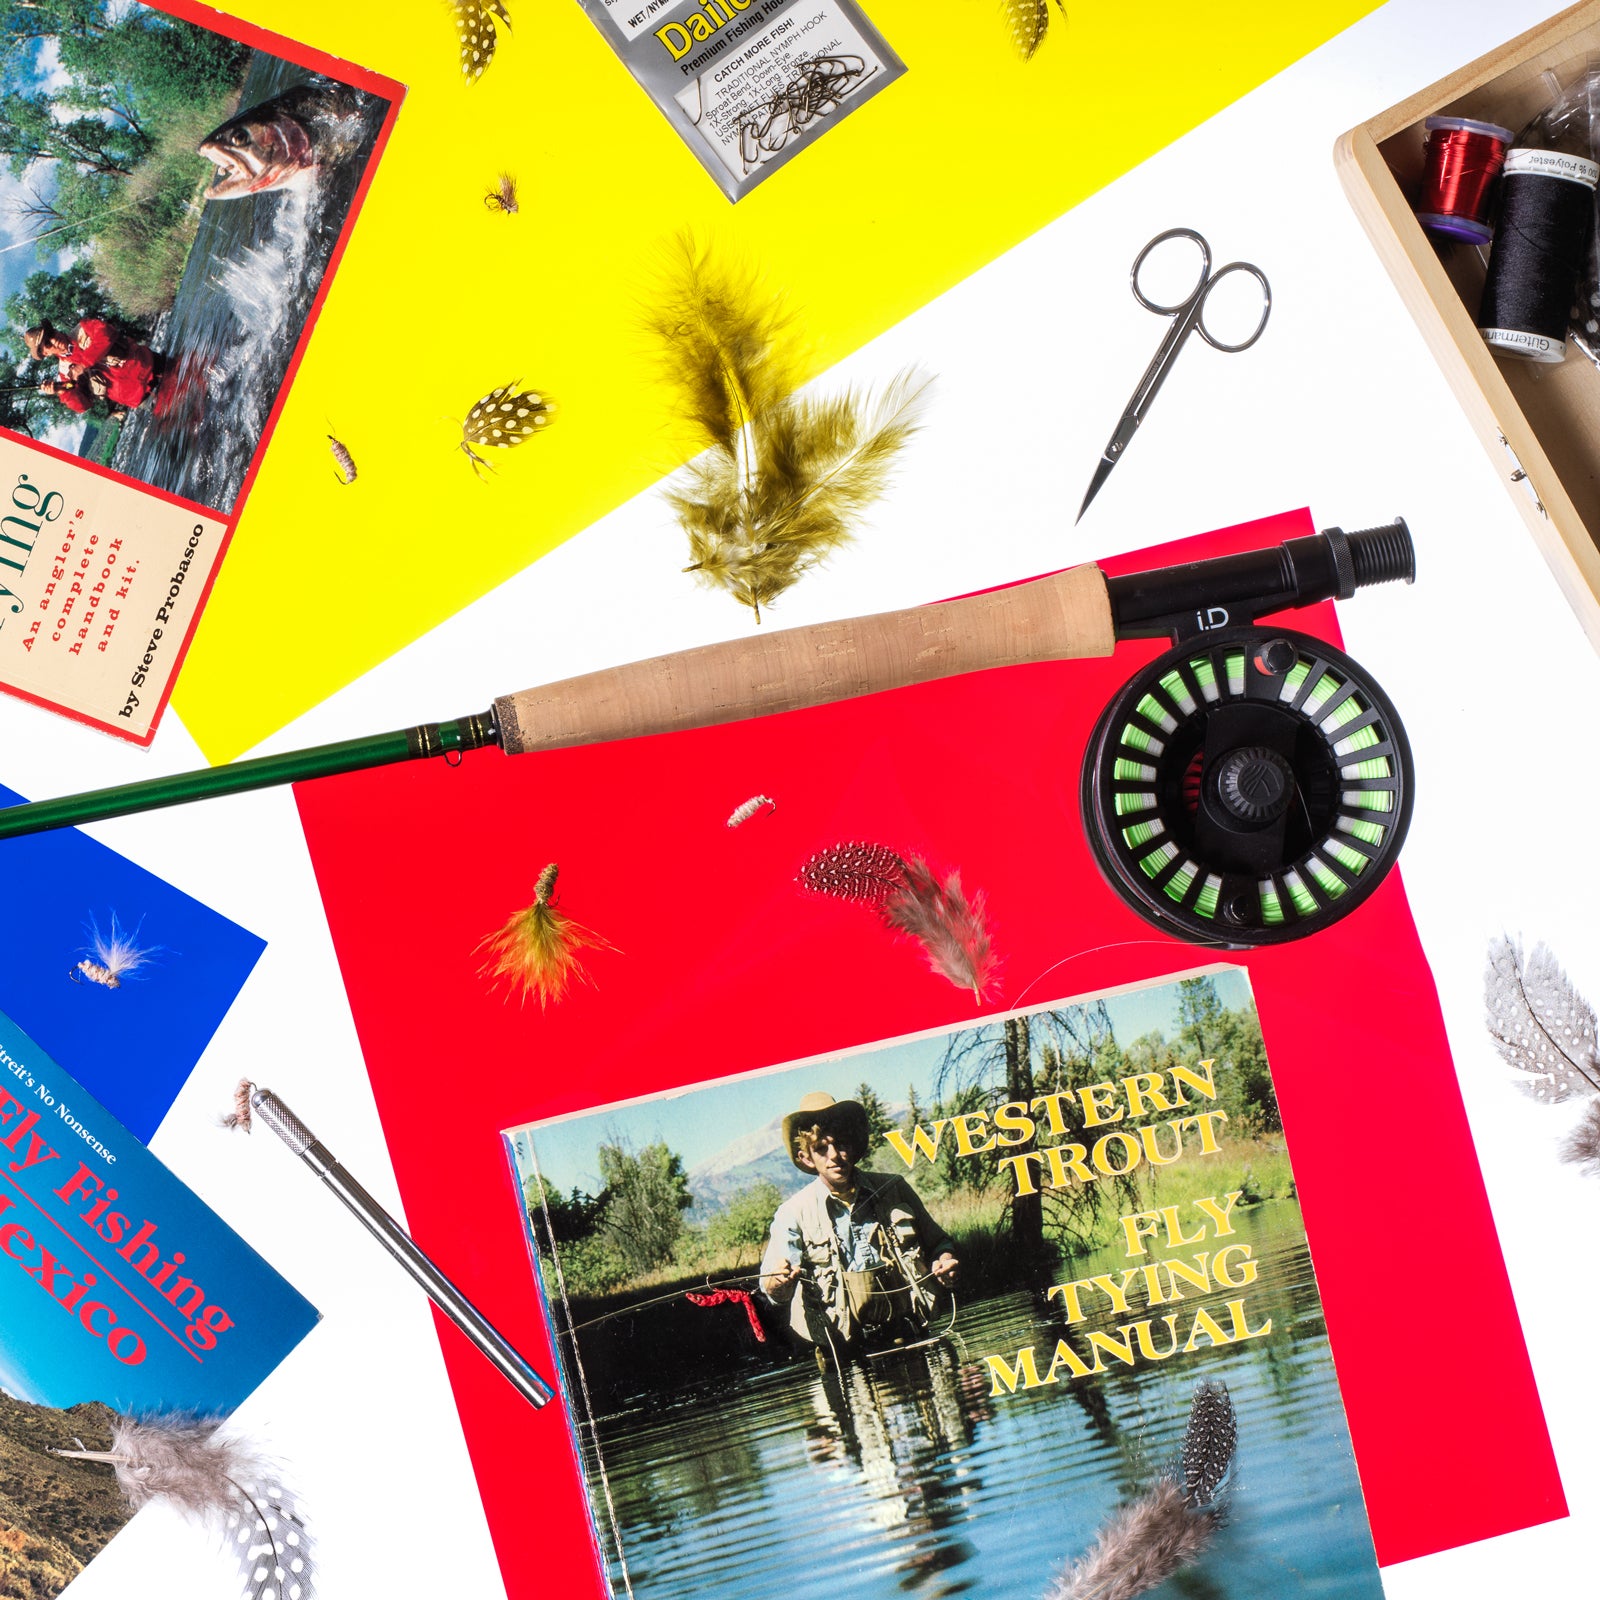
Materials
Vise
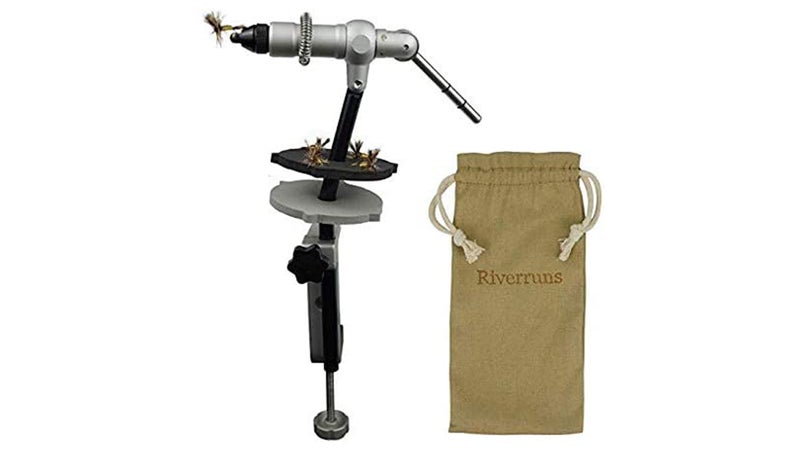
I went four years without a store-bought fly vise. Taking the gist from these , I snapped a 1.25-inch binder clip to the top cover of a hardbound book, threaded a through the clip’s wire grips, and used the tip of the handle to hold the hook. It looks janky but works just fine for non-fiddly patterns like basic bugs. (If you would prefer to use a vise right off the bat, try from Riverruns for $50.)
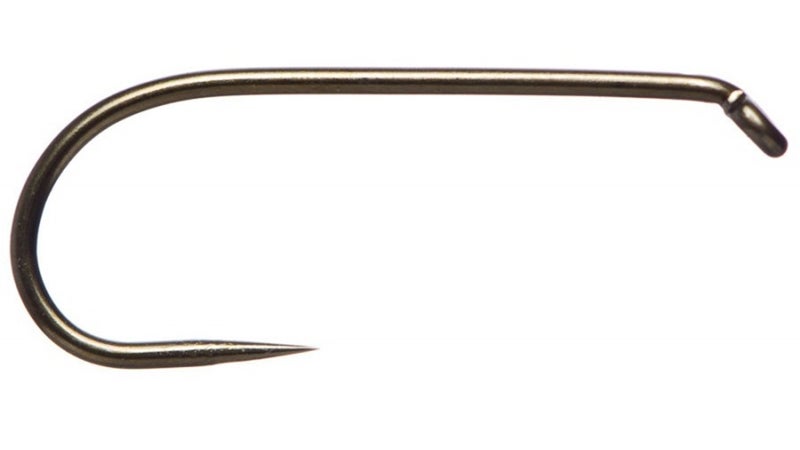
Daiichi 1190 Barbless Dry Fly Hook Size 12Â ($6 for 25)
The straight shank and U-bend of a nymph hook work well to present the body of a bug. are made of carbon steel and have a reputation for being strong and incredibly sharp. I love the 1190 because I : it’s less damaging to the fish’s mouth and much, much easier to unhook from clothing and human flesh. (If you can’t get 1190s, the barbed is the same shape and the barb crimps down easily with pliers.) Size 12 is a solid Goldilocks for general-purpose trout fishing.
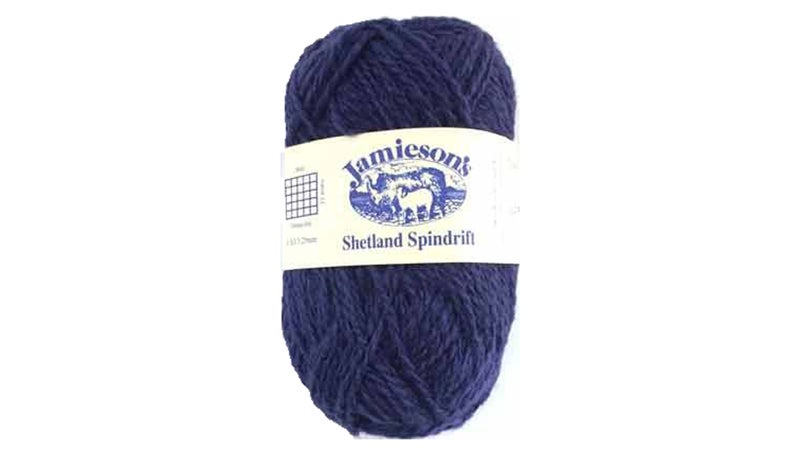
Jamieson’s Shetland Spindrift Yarn ($7)
is beloved by fly tyers. It comes in realistic colors with mottled heathering that adds dimension to your flies. The strand is thin enough to neatly and securely wrap a hook shank, with enough loft to give a realistic rounded body shape. Its fibers also hold up incredibly well to the abuse of fish teeth and algae snags—I have a few flies I’ve been fishing for four-plus seasons, and they still look great. Plus this yarn is 100 percent wool, so you can feel good that you’re not contributing plastic microfibers to the ecosystem. The three colors I’ve been using loyally since I started tying: 101 Shetland Black, 290 Oyster, and 259 Leprechaun. If your fish like olive bugs more than mine do, 231 Bracken is your color (for the general theory of visibility in the water, here’s a brief primer from ). You only need about five inches of yarn per fly, so a 115-yard ball should yield more than 800 flies.
Hareline Wooly Bugger Marabou ($6 and up)
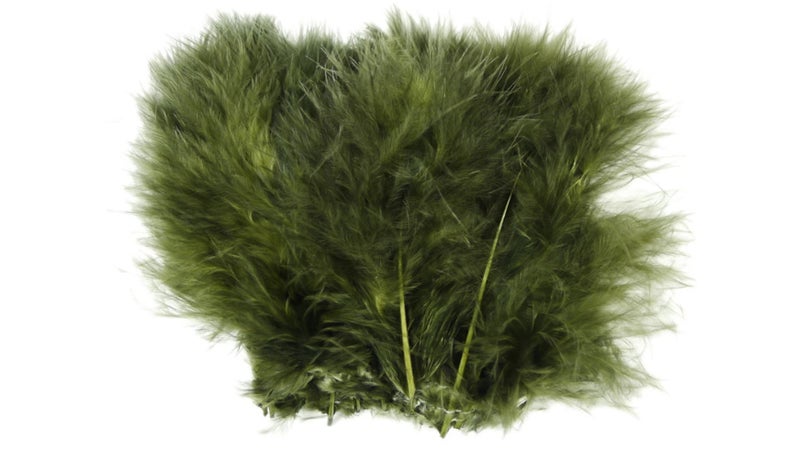
Here’s where it starts to get fun. These fluffy boa-type feathers undulate beautifully in the water and make your fly look alive. comes in a slew of rainbow hues, but the workhorses are black, olive, and white, because they resemble the legs and wings found in nature. Look for or marabou that’s labeled for wooly buggers—this will give you nice tapered length and volume for an appealing tail. I’ve got a quarter-ounce bag of black marabou from Hareline Dubbin that I’m just starting to put a dent in.
UTC Ultra Wire Small ($2)
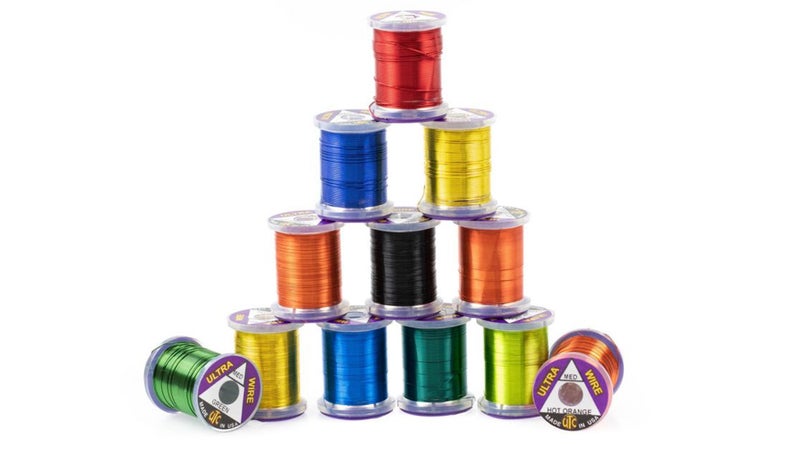
All-copper adds a flashy, bite-inducing finish. Choose the small diameter for tying bugs; the copper color goes with every yarn color; for some variety, red adds a bright visual pop to Jamieson’s Oyster. Most fly tiers mount their wire on a ($10), which allows you to let go of it without the whole thing unspooling. This is useful, but it’s a pain to thread (unless you spring for a ) and unspooling without kinking the wire is a bit of a learning curve. Using a piece of electrical tape to secure the wire to the spool does the same job, if less elegantly. You’ll use a few inches of wire per fly, so a spool should last you a few seasons.
Japonesque Pro Performance Beauty Scissors ($9)
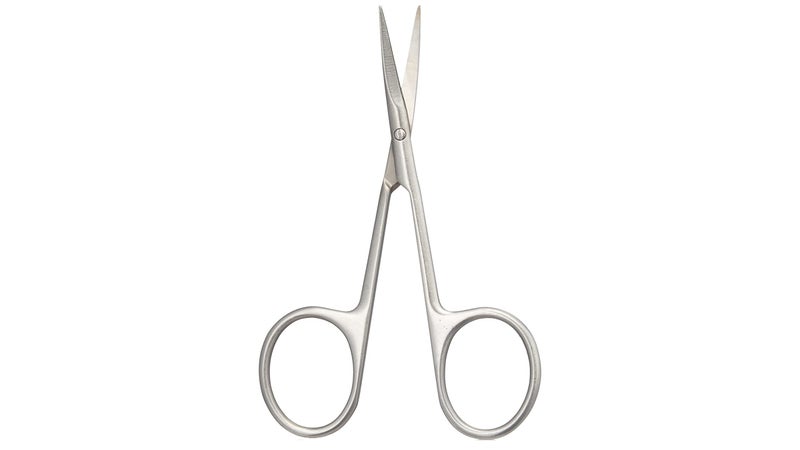
For neatly trimming yarn and wire, big ol’ paper scissors will not do. You can pick up a great pair of tiny snips from a fly shop for under $20 (such as the ), or save a few bucks and grab a pair of cuticle scissors from the beauty aisle. has curved blades, which get in close and hug the fly body to cleanly trim feather nibs. Pro tip: use the back of the jaws to cut wire, which will dull the blades over time, and keep the front tips sharp for snipping feathers.

Optional: Gorilla Superglue ($4)
Tightly wrapped Ultra Wire helps keep the fly from slipping down the hook shank while you’re tying and casting. But as the fly breaks in, it’ll loosen up and you’ll have to pause to wiggle things back into place. A fine slick of superglue on the wire will help delay the inevitable, though it’ll add a few minutes of dry time to your tying. If you go this route, make sure your tube has a precision tip, like .
Instructions
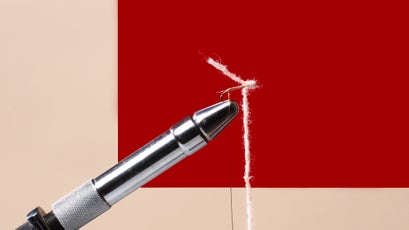
1. Clamp the hook into the vise or X-Acto handle so the sharp tip is covered. (This prevents snagging while you’re tying.)
2. Start wrapping the copper wire at the eye and move down the hook shank toward the curve. To get nice, tight wraps, it helps to begin with a long tail of wire held against the shank. Once you’ve got it started, make sure your wraps line up next to each other. Continue wrapping until the wire is just shy of the curve. Set the wire spool to the side. (Optional: Apply a bead of superglue along the length of the wire. Let dry completely.)
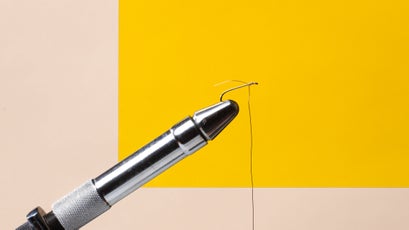

3. Wrap the yarn in the same fashion as the wire, beginning at the eye and proceeding down the length of the shank until you’re about one width of yarn from where the wire ends.

4. Wrap the yarn back up the shank toward the eye, stopping one width of yarn short of the eye. This will give you a nice tapered body shape. Wrap back down the shank all the way to where the wire ends. Holding the yarn tension firm, pick up the wire and wrap the wire around the yarn tail five times.
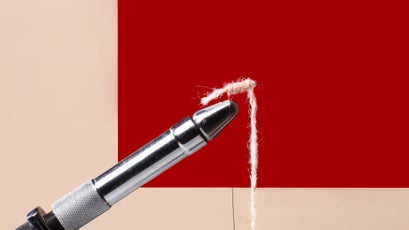

5. Wind the wire up the body toward the eye, ending where the head tapers. For a size 12 hook, you should have four or five wire wraps. Set the wire down.

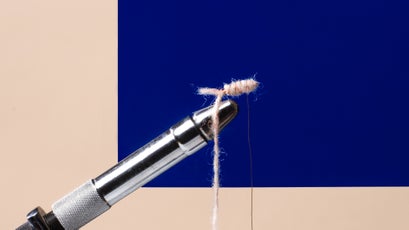
6. With your fingers, peel a half-inch strip of fluff from a marabou feather. (If you peel a strip of quill along with the feathers, that’s a good thing: it helps keep the feathers together during tying, and you’ll trim it off when you finish.) Pinch in the sides to make a bundle.
7. Place the bundle on top of the fly with the quill end over the hook eye. The feathers should extend to about the U of the hook; if not, scoot the bundle forward or backward. Wrap with wire over the bundle three times to secure.
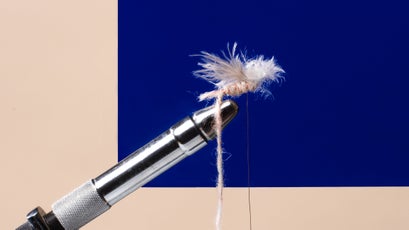
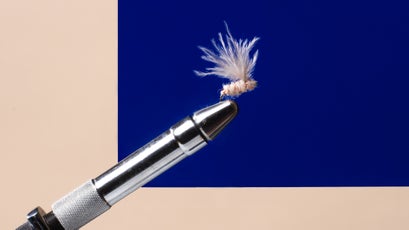
8. Tie off the wire in front of the feathers with a , snip the wire and yarn, and trim the feather ends close to the fly body in front of the wire wrap toward the eye. Go forth and catch many fish.