

You don’t need to spend several thousand dollars on a fancy underwater camera set-up to capture great images. That’s an important lesson I learned just before my recent trip to the Dominican Republic. �� �� ��
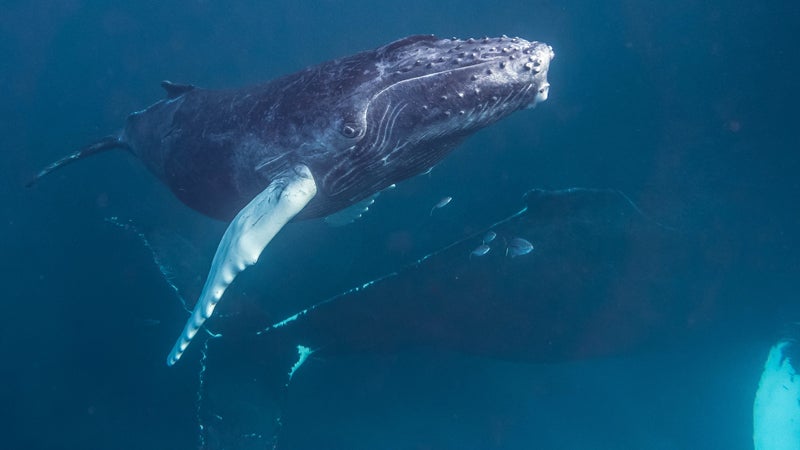
It all started during the long passage from Ushuaia to Antarctica when fellow photographer Richard Anderson showed me absolutely ethereal images of humpback whales hovering in an aquamarine sea—the Dominican Republic’s famed Silver Bank—he’d captured with a point-and-shoot.
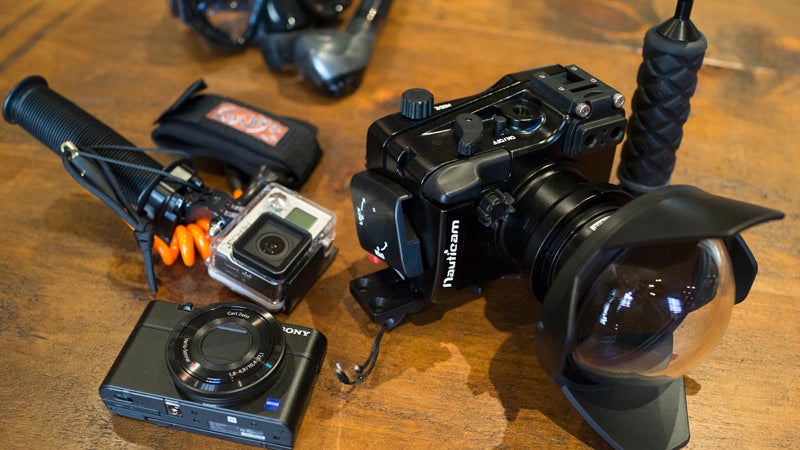
I was sold. As a land photographer, the idea of buying (and lugging around) a $6,000 housing/lens system for my D800E seemed a bit excessive. So when I returned to the mainland, I set out to acquire a more modest underwater kit. After consultations with a few underwater pros, I settled on a with a and a . I also picked up a and wrist strap. The Nauticam housing wasn’t exactly inexpensive—all told, it cost about $1,600—but it was small and came highly recommended. �� ����
Next, I booked passage aboard the Sun Dancer II with Captain Gene Flipse of Conscious Breath ���ϳԹ���s and set out to capture some stellar underwater images.
Fast forward six months, and I just returned from the week with the whales. It was an incredible experience, but I also learned some tough lessons about underwater photography. ��
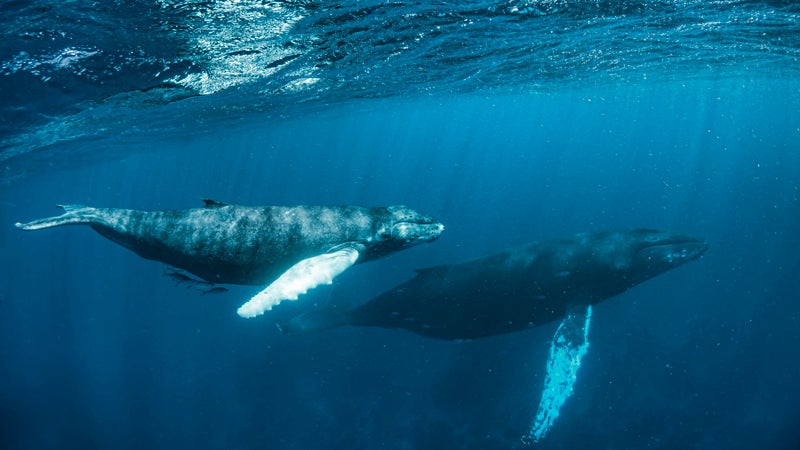
First, I should note that I was snorkeling in relatively clear water with plenty of light. After my first whale swim, I checked the shots on my Sony and was very disappointed—most were blurry. After quite a bit of trial and error (and consultation), I triangulated on the optimal settings for the conditions—Mode: . Speed: 1/160.�� ISO 200. Exposure: -1. (Hint: whale pectorals are very white and will be overexposed unless you compensate.) ��
Although it’s hard to see the camera display underwater, it’s very important to give the camera time to focus on every shot. In other words, don’t press the shutter unless you have the focus locked.
Much to my surprise, I preferred the images without the fisheye and often left the lens in my bag. All of the images required a fair amount of post-processing—recalibrating the white balance in Lightroom/Photoshop or iPhoto is crucial. It took two days, but once I got my settings nailed, the quality of the images improved dramatically.
For most people though, the GoPro will be the camera of choice. It’s versatile and relatively inexpensive. But make sure you think about how to mount the camera before taking it on an underwater trip. Snorkelers should avoid chest, wrist and mask mounts because they’re difficult to aim.
My wrist mount captured great video of my fellow snorkelers but rarely captured any whales. I found the best option is a —a short stick you can attach the camera to.��And I would suggest using just one camera at a time—for your own sanity. I took some stills with the GoPro, but I wasn’t impressed. ��
So which camera should you buy? If you’re on a budget and primarily interested��in video, I would suggest the GoPro. If you’re looking to capture high-quality stills such as the one above, go with the Sony. Once I got the settings dialed, this camera worked wonders.��
To see more of Michel’s whale photos, watch the video below. ��
��