

I could give you the spiel about my love of the vanlife concept—I’ve wanted to do it since before Instagram was a thing, I’m a��camping nerd, I think travel is good for a healthy economy—but I’ll get straight to the point: I don’t think people should build out a vehicle for a price tag that has more than two zeros before the decimal.��
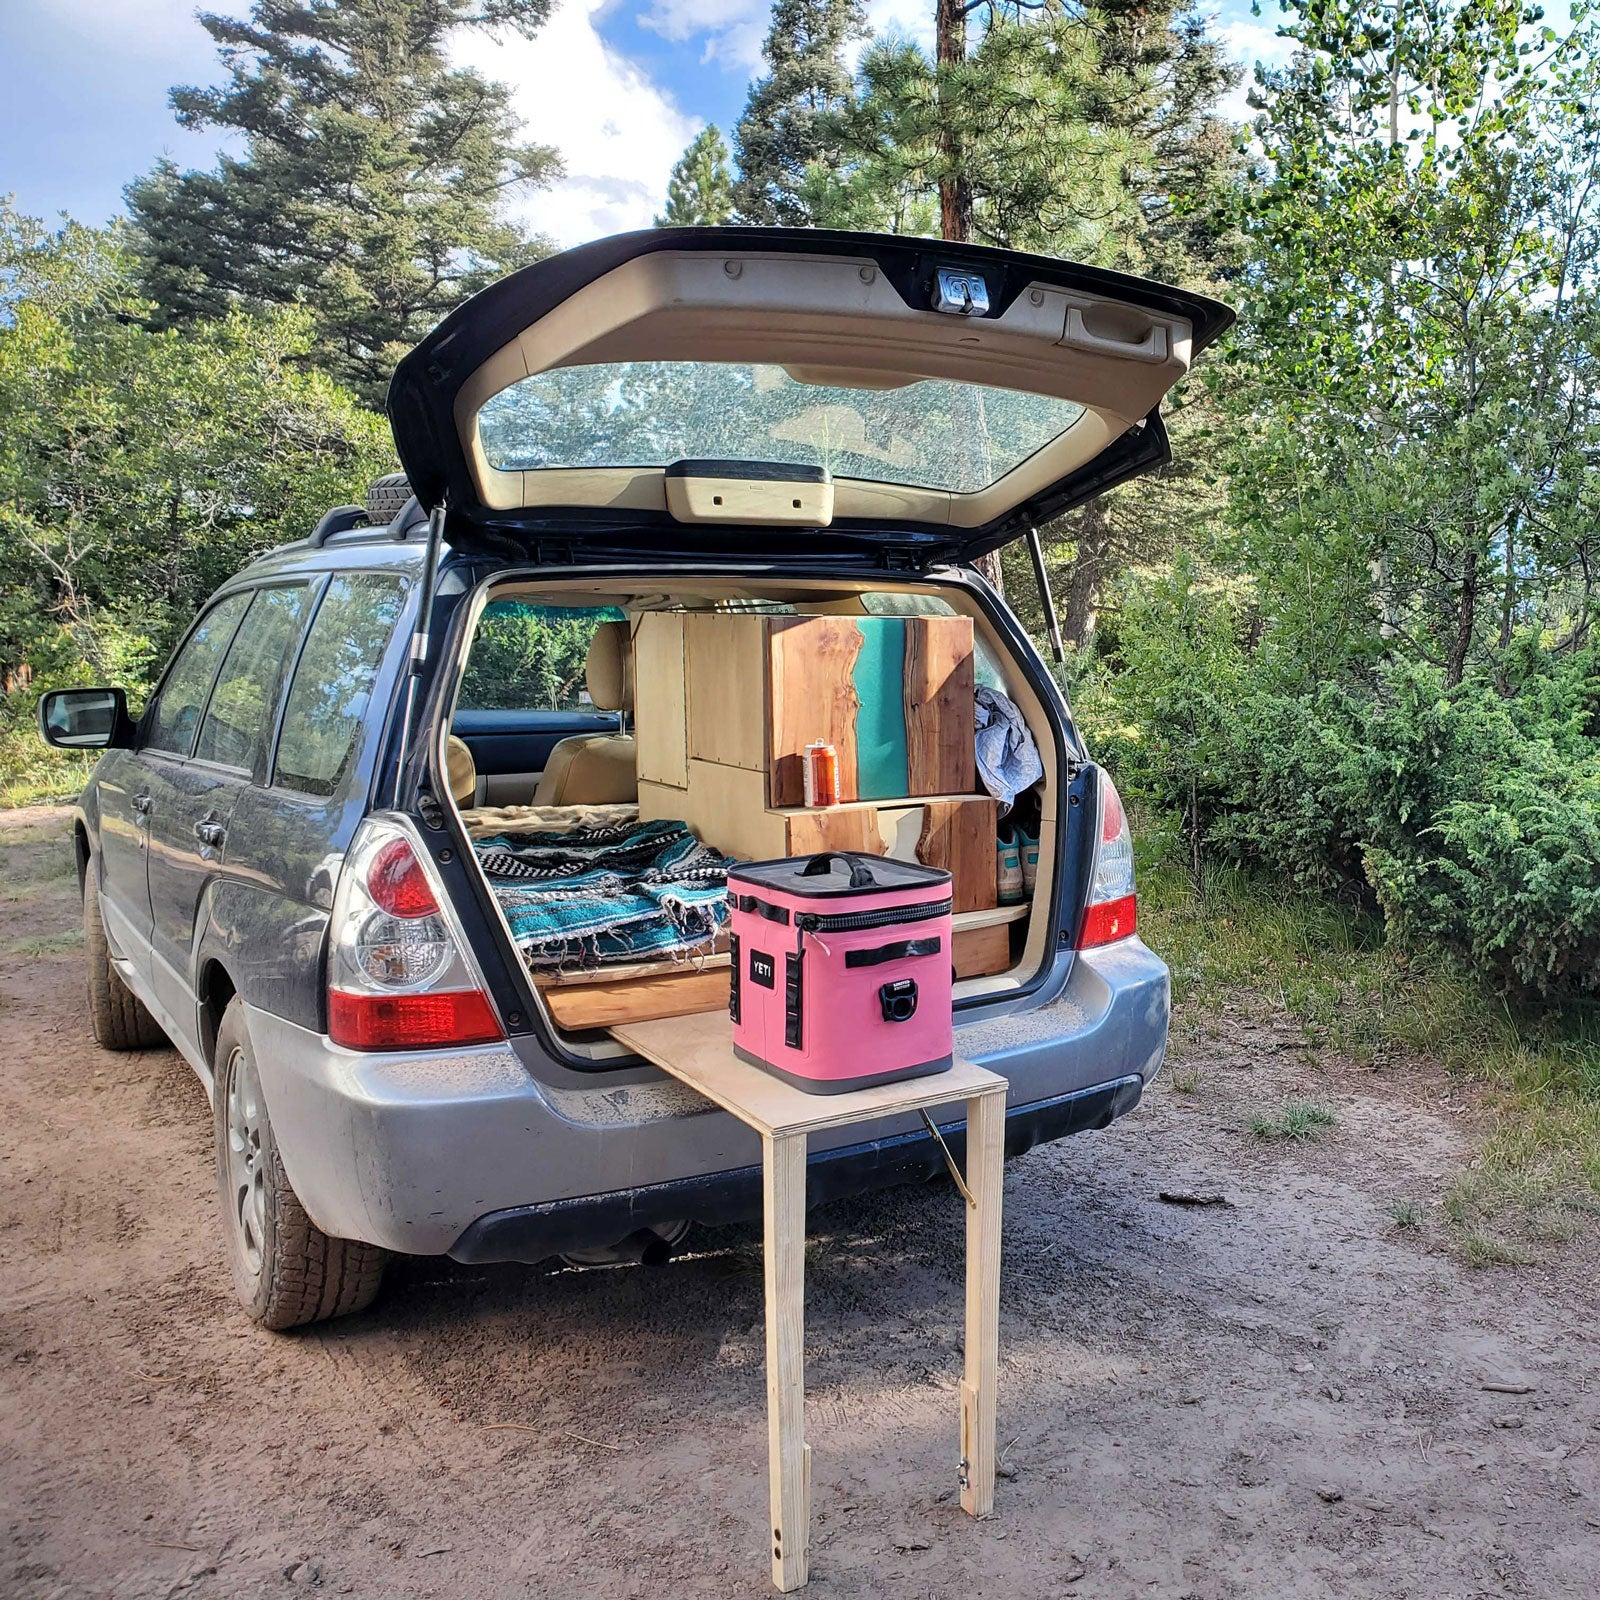
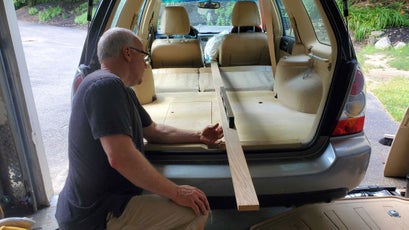
Instead, like any twentysomething��with a low-to-average paycheck, I looked at what I already had—a 2008 Subaru Forester—and thought, ‘I bet I could make a cheap build in the back of that.’ So I called up Larry Dube, my dad and a software engineer with a knack for woodworking, and hatched a plan. Here’s what we came up with.��
The Requirements: I didn’t want to remove my back seats��(what if I had to drive my friends somewhere?), needed��enough room for my 40-pound dog and I to curl up and sleep, and had to have��plenty of storage. But most of all, I wanted to experiment with a design that��virtually anyone could do regardless of their skill level, all for less than $350, which seemed to be about as cheap as I could get��for our design.
The Caveats: I had access to the tools from my dad’s workshop, which he’s been filling for decades. Having him around for the project��was a huge asset, because he has a building brain.��(It’s a thing!) And because of him, I know my way around a workshop—a very��helpful starting point.��
For anyone lacking��access to tools, fear not: depending on your location, you can rent them at places like ��and��. If you prefer to��own stuff, you can rent-to-own the necessities��at ��or get discounted used tools at Home Depot, Craigslist, and��.��For the purposes of this article, I’ll be pricing out tool rentals��from Home Depot.��
If you’re new to��woodworking, there are tons of resources available to get you rolling. Check out Instagram and YouTube for pointers and basic instruction. My dad and I turned to����and got a lot of inspiration from its designs.
The Timeline: We completed��this build over the course of about eight days, working in the time after our nine-to-fives��and on the weekends for a rough total of 40 hours.
This design��is in no way prescriptive of what you should do for your own Forester,��other Subaru models, or any other vehicle that you already have. I’m splitting it up into��parts so you can decide where you want to stop or improvise. (Don’t want a cabinet but do want drawers somewhere? Raise your sleeping��platform a few inches and utilize that space. Just interested in��a bare-bones platform? Ignore the add-ons.) There are countless creative builds out there to draw inspiration��from.��
Pro Tips and Things to Consider
- Having a plan��before��you��start, right down to the hardware and specs, will make the build-out that much easier. My dad and I went back to the drawing board multiple times, even with initial specifics nailed down.��
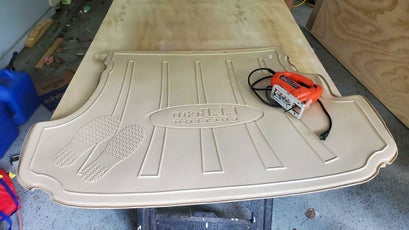
- We used the mud mat that came with the car to speed up the build process��by tracing its outline on our plywood. That��made it super easy to cut out the funky design we needed for the back half of the sleeping platform.��
- Measure everything,��then measure it again. While you’re doing so, be��sure to account for the width of your plywood—half-inch or three-quarter-inch plywood adds��up��fast.��
- Cut your lines as straight as possible. Even a slight curve in the wood can make things like hinges or drawers impossible to close or lay flat. Sanding down anything curvy can help in a pinch—but it’s also a pain in the ass.
- Make sure your car is on level ground while you’re working on it. This becomes important when you’re trying to get that��platform just right. (You’ll thank me when you’re not sleeping at an angle.)
- This should go without saying, but remove all of the car tools underneath your Subaru’s floor storage. I’m pretty sure that my car’s jack is now permanently built in to my Forester.��
- We found that, in our area, Home Depot was generally cheaper than Lowe’s. (No, this isn’t an ad for Home Depot or Subaru.)
Step One: Empty Out Your Car and Put in Your Base
Materials:��
- One full sheet of half-inch sanded plywood
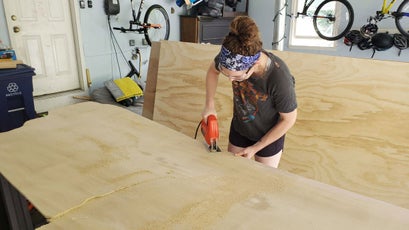
- Jigsaw
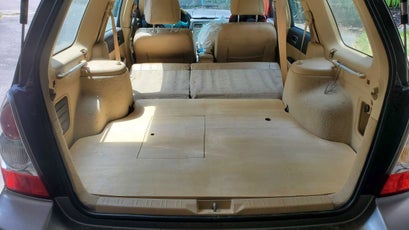
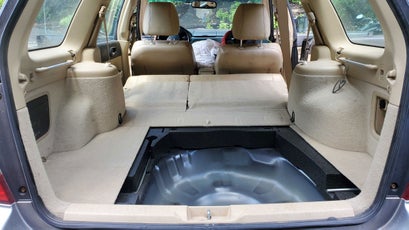
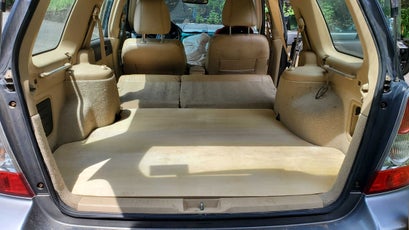
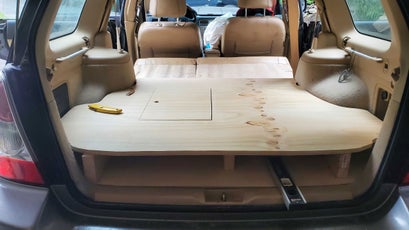
Even without removing its��seats, Subaru Foresters (and its��sisters, the Outback, Legacy, and Crosstrek) have��a ton of secret storage; aside from the spare tire well, there are pockets on either side in the way back, tool-storage areas under panels behind the��back seats, and lots of space where passengers would normally rest their legs.��The well where your spare tire lives is perfect for a small battery or nonessential gear. For our build, we cleaned out the back, attached the spare to the roof with bungee cords, laid��the seats down, removed all of the additional car tools hiding beneath storage flaps—except for that aforementioned jack, oops!—and measured everything out.��
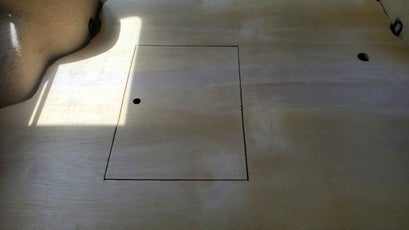
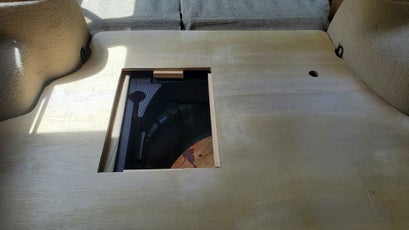
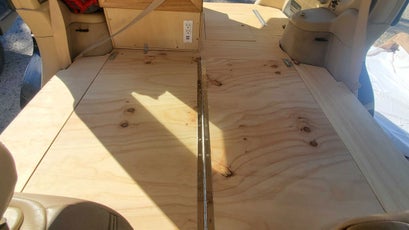
For our design, the sleeping platform had��three sections: the base, the top, and a��removable flap that would go over the folded-down back seats. Lay your base first—we used half-inch sanded plywood, cut to fit with a jigsaw. This will serve as a sort of anchor. Some builds screw this platform into the frame of the car. We didn’t, and in our testing, it has��proven��completely sturdy. If you’re��using that spare well as extra storage, don’t forget to cut a hole in the base that will allow you to access it.
Pro Tip:��If you have no mud mat, lay down parchment paper or cardboard where the mud mat would have been, and trace its permeter. For beginners, this is an easier way to get a really tight fit, rather than measuring all of those odd��angles. You’ll want to use this strategy again, in step two,��to trace the top of the platform.��
Step Two: Raise Your Sleeping Platform

Materials:��
- One full sheet of��three-quarter-inch sanded plywood
- One eight-foot-long two-by-four
- One eight-foot-long two-by-six��
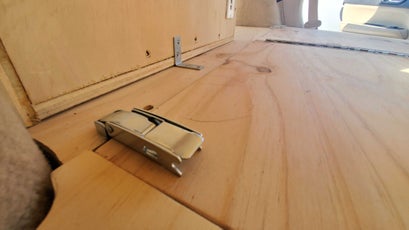
- Two chest latches��
- Three 36-inch piano hinges��
- Package of one-and-five-eighths wood screws
- One 12-inch piano hinge (optional)
- Jigsaw
- Circular saw��
- Electric drill
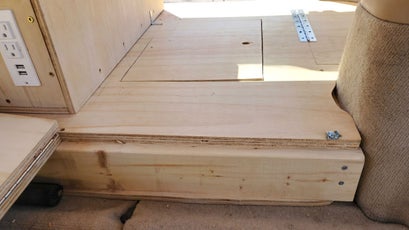
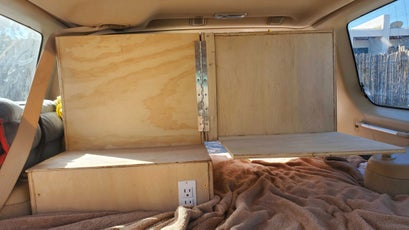
Repeating the same process described in step one, retrace that mud mat on a sheet of three-quarter-inch plywood—this will result in the top of the platform. Don’t forget to cut a panel��so you can reach your lower storage��from��this top section as well (we let our panel rest on pieces of wood and just lifted it out, but you can add a hinge here based on your preference—see photos above).��To support��the��platform, we used a two-by-six��sectioned into three parts and shaved down as needed with a table saw (a jigsaw and some good sanding can also do the trick here)��to make sure the entire platform would be level. Perpendicular to those two-by-sixes, we inserted��a two-by-four at the base of my car’s��back seats to hold up the front end��of the top platform. This��two-by-four is key: you’re going to want to cut the top panel so it rests at just about the halfway point of it, because the removable panel that will go over your seats needs to rest here, too.��
We also used the three-quarter-inch plywood to create the removable panel that would go over the seats. We got slightly overexcited about the design here without thinking about how clunky it might be to take out, so definitely riff on our idea. The platform we came up with consists��of four parts: two rectangles in the middle and two flaps on either side to accommodate for the space near the doors. We attached these parts��together with piano hinges, so the��entire piece folds up like an accordion for removal and storage��(see the��above photos). When flat, the panel��lays on the lip of that aforementioned two-by-four, and once it was all��fastened in, we attached the two halves of the sleeping platform together with a couple of chest latches.��
Once everything is��said and done, you’ll find��that the��two-by-fours beneath your platform create some pretty nice storage in the corners of your car. This wasn’t in the plan, but I also cut a section out of my sleeping platform, popped a piano hinge on it, and created another accessible storage area. In addition, we��popped in a simple pull-out table on one side; it’s��made from��scraps of��plywood, with��two-by-sixes for the legs, and is attached by . Modify at will!
Pro Tip: A circular saw will help you cut straighter lines than a jigsaw. Use it anywhere where hinges are involved.��
OK, before we move on to step three, which is totally optional, take a look at your car—you now have pretty much everything you need to car camp! From here, you can decide to make the sleeping platform a few inches higher and put in some drawers, or you can take out your back seats entirely and add��a ton of extra storage. We opted to insert��cabinets because we liked staying up until 2 A.M. working on modifications. But most people are normal.��
Step Three: Incorporate Cabinets and Drawers
Materials:
- One full sheet of��quarter-inch plywood underlayment
- A second full sheet of��half-inch sanded plywood
- Wood glue
- Package of one-inch wood screws
- One 24-inch drawer slide set
- One 12-inch drawer slide set
- Six cabinet hinges
- One folding hinge
- Three L brackets
- Circular saw
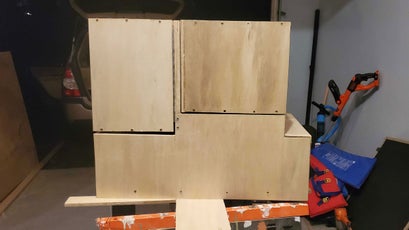
The talk of the town in the LaPlante-Dube��household during the build process��was this cabinet unit, which is sweet but relatively complicated for beginners. It was really helpful to have my dad around to make this design a reality. (This is the guy who��used to saw apart his sisters’ bikes to��create a “Harley” of their combined pieces.)
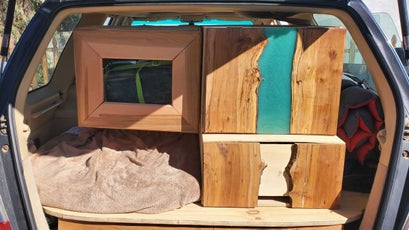
We built the cabinet unit outside of the car, measuring for height as well as the thickness of the boards we would be using, and fastening��it onto the back half of the platform with L brackets. Disclaimer: we put it on the passenger side of the car, but I’d recommend putting it on the driver’s side—that makes it easier to see what’s going on in the passenger��blind spot. Second disclaimer:��with the addition of this cabinet, your sleeping platform is only good for only��one person and a dog.��
The cabinet unit is made of three parts: a��drawer as the base and,��on top of it, one cabinet in the front and one in the back. To accommodate the seats coming up,��the front cabinet is hinged to fold into the sleeping area (my dad added a little table platform on the back of this cabinet as a fun extra; check out the photos above). We fashioned it so the front cabinet could also pull out like a drawer—one modification possibility��for people who are interested.��
Pro Tip: Since this is an optional part of the build, I won’t get too deep into the details here. But building drawers for the first time can be��tricky; they require drawer boxes and tight frames, super straight lines, and patience with extremely small screws, all of which tested me. There are a ��on YouTube that can help you go over the simple mechanics of it.��
The Build in Real Life
The scariest part about this process��isn’t the sharp tools or the tiny screws or the moths flying around your late-night construction��scene—it’s making sure it all actually works.��Since I built out my car in July, I’ve taken it on a handful of off-road trips here in New Mexico, and I’m happy to report that even on the bumpiest of roads, the cabinet faces stay shut, the unit hasn’t shifted, and once I’m��parked, it’s provided��plenty of room for my five-foot-two-inch frame and dog.��Still, there are some things I would change: as previously mentioned, I would shift the cabinet unit to the other side of the vehicle, and I would definitely paint the entire build��in polyurethane up front: plywood stains easily and absorbs water, and having even a little protection from a muddy dog or spilled��camping beer would be better than nothing.��
Tool and Hardware Index
Wood:��
- Two full sheets of ($74��total)
- One full sheet of�� ($41)
- One full sheet of underlayment ($16)
- One����($4)
- One ($8)
Wood Total: $143
Hardware:��
- Two packs of wood screws
- ($2.50 for 40)
- ($9.21 for 75)��
- ($4)
- Two ($8 total)
- Three ($12 each)��
- Two ($7 each)
- Three ($3.19 each)
- Six ($1 each)
- Three ($2.75 each)
- One ($30 for two pairs)
- One ($13.49)
Hardware Total: $141.02
Tools:��
- Jigsaw (rental: )
- Electric drill (rental: )��
- Circular saw (rental:��)
- ($4 and up)
- ($4.29)
Tool Total: $69.29