

It’s a classic Burning Man hack: scale down a residential swamp cooler to a compact, 12-volt bucket that hangs outside your tent on the playa. Instant air conditioning. You need a battery, computer fan, and a cooling pad from the hardware store.
Even if you’re not heading out to burn the man, we found many uses for our DIY cooler, from car camping to multi-day photo shoots in dry, hot conditions. The problem with an evaporative cooler, however, is that the humidity needs to be low to use it. We found hot days in New England no match for our new device.
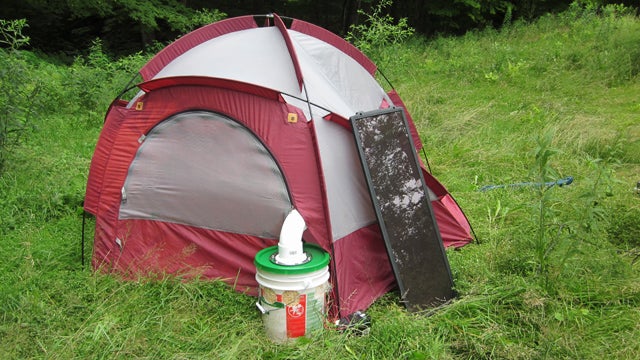
It works by spritzing water over a fluffy fabric inside, while a fan sucks outside air through the fabric and into the pipe on top. You can aim the pipe just inside the tent door, filling your shelter with moist, cool air. To build our cooler, we picked the from makers online and added our own twists, like a humidity sensing Arduino controller, a solar panel to keep it always running on sunny days, and a timer for the water pump to conserve energy.
To start, as blogger explains, you need to drill big fat holes in your bucket using a of pretty much any size. Then stuff the cooler pad inside the bucket.
Create a drip irrigation system by poking holes through some flexible tubing. Of all the methods described, we found burning the small holes in the tubing easiest and most accurate. You want them facing down to soak your pad. We also used Super Soaker pumps instead of the suggested by other swamp cooler makers. These battery powered guns contain powerful DC pumps that work well here.
We cut a hole in the bucket’s top, bolted on the euphemistically titled “closet flange” (really a toilet pipe end), and screwed in the fan underneath. Where other plans call for a metal air duct, we found the plastic flange easier to handle than the sharp metal duct.
In the most simple system, you wire everything together and it runs constantly until the battery runs out. In our second version, we decided to make it smarter so we added a solar panel and battery charger to automatically boost our power source during daylight hours. We connected an Arduino controller to the pump and fan, using a part called a to protect the device’s delicate circuits from the current. Then we connected a humidity and temperature sensor to the Arduino that tells us how effective our cooler will be in the current environment. The brains of this system cycle the water pump on for 10 seconds of every minute, and shut everything down when the battery reaches 11 volts.
Parts List:
5-Gallon Bucket
(24 by 36 inches) ($7)
PVC tubing, T connector ($5)
Old computer fan ($4)
($6)
($5)
12-volt battery ($10 to $20)
Screws, wire, small connectors if necessary
($10)
Total Cost: $55 to $70
Optional:
($30)
($20)
($10)
LEDs ($2)
($90)