

Price
There’s really no need to spend more than $400 on a tent. It’s even possible to get a good one for $200, but dip lower than that and you’ll be compromising quality and reliability. Want lighter weight or burlier materials? It’ll cost you.
Design
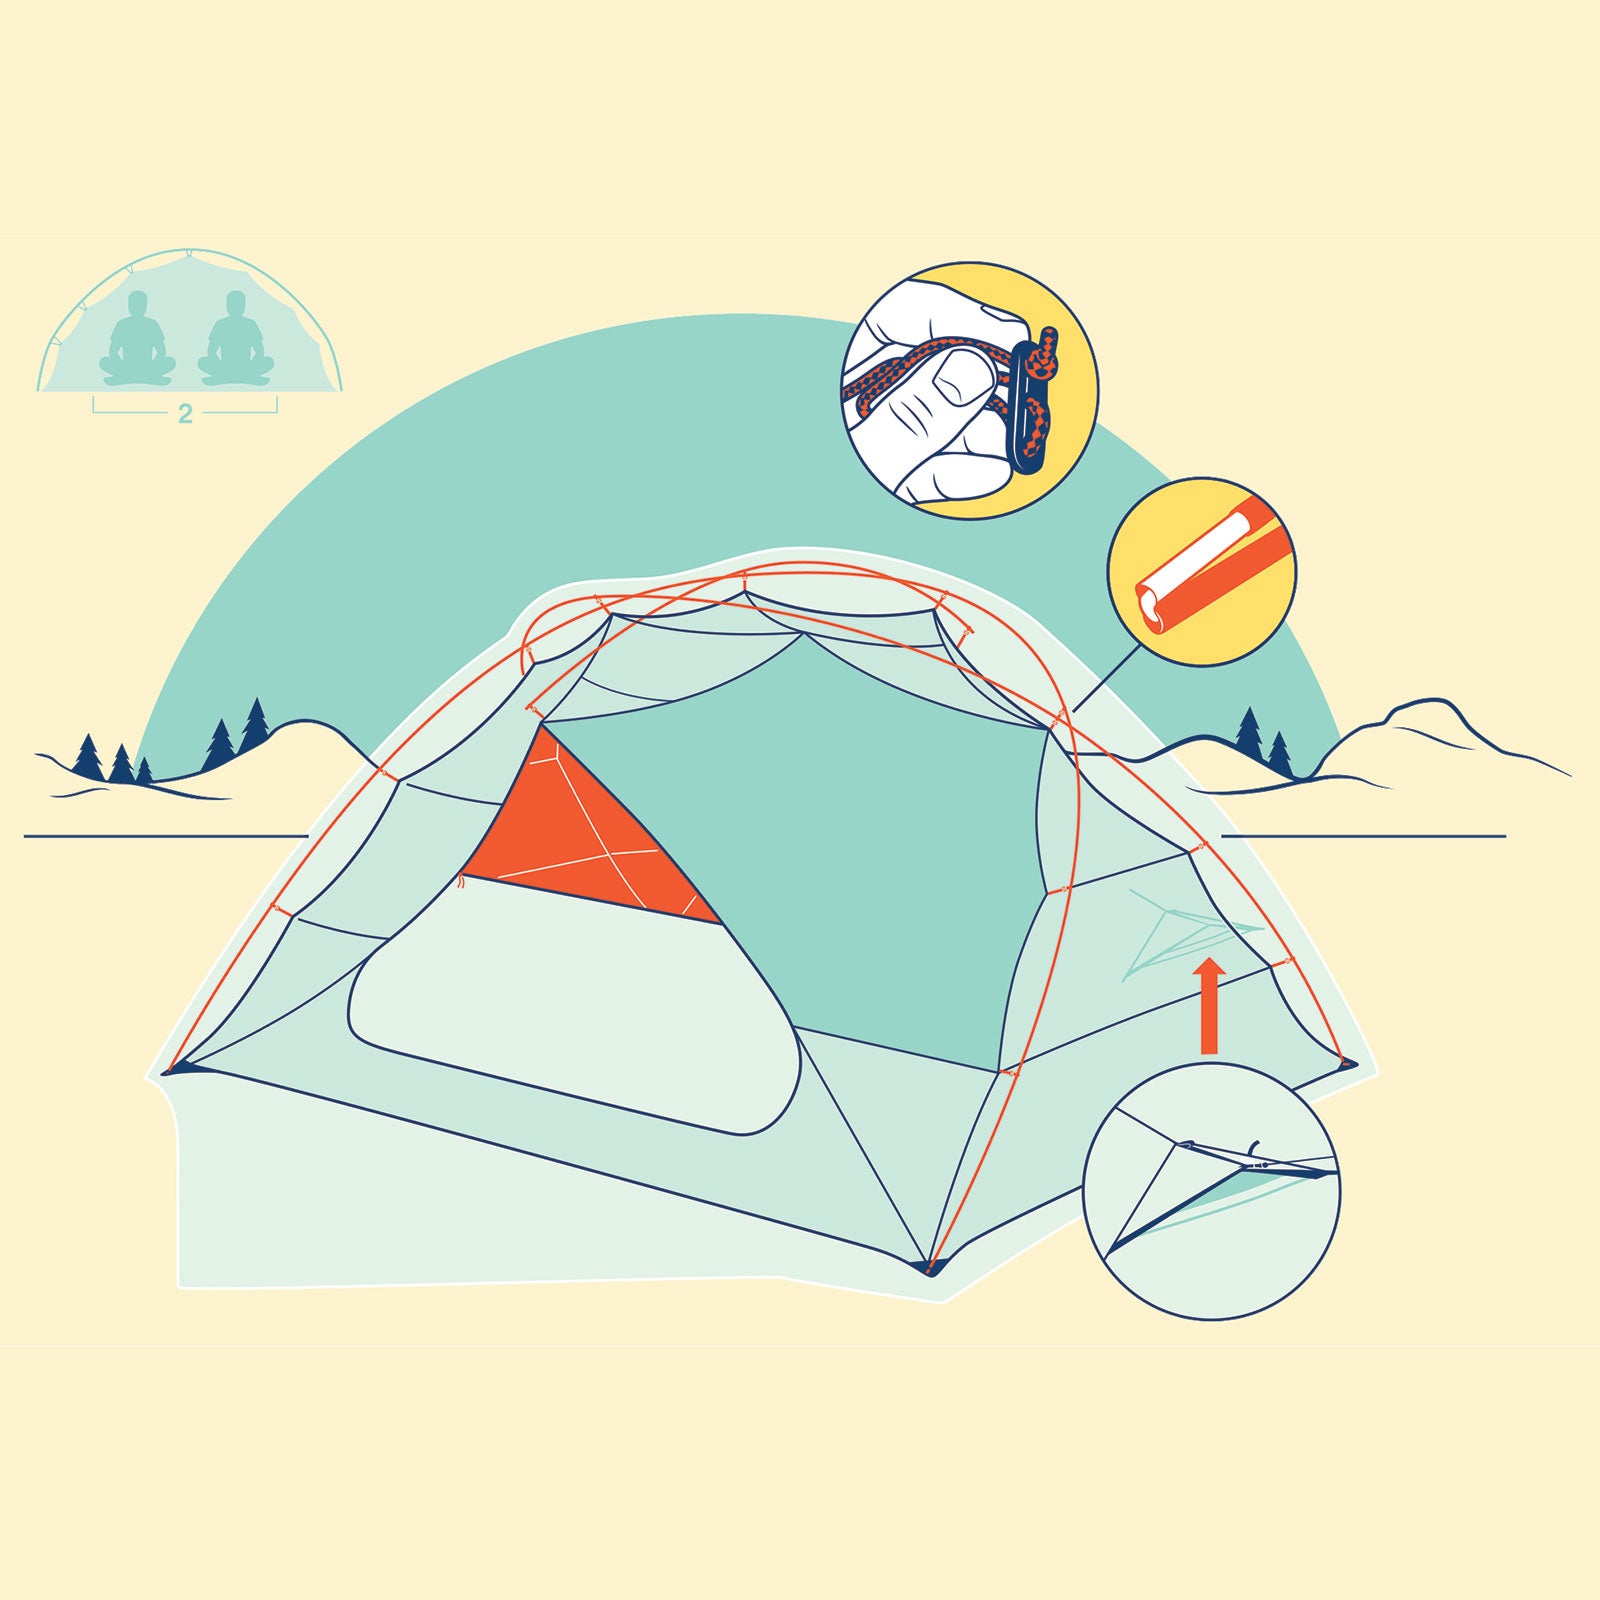
Freestanding tents don’t require stakes to stand upright: once the poles have been fed through the sleeves or eyelets on the body, they stay put on their own. As a result, they’re easier to set up. Non-freestanding tents forgo some of the pole sections, instead using stakes to provide extra stability. They frequently weigh about half a pound less than comparable freestanding models but require more time and patience to set up.
Poles
You have three choices when it comes to pole materials: aluminum, fiberglass, and carbon fiber. Most backpacking tents use aluminum, for its balance of durability, light weight, and moderate cost. Allow us to steer you away from fiberglass; commonly found on lower-price tents, it’s less resilient than aluminum and snaps more easily. Some tents, typically superlight models, use carbon fiber or a sturdy composite. Doing so cuts weight while increasing strength, but you’ll pay for it—about $200 more than a similar aluminum setup. Traditionally, tent designs involved at least a few individual poles; some are still made this way, but many now have hubs that integrate the poles into a single multi-armed structure. This allows manufacturers to produce roomier tents with fewer pole sections, cutting weight without decreasing livable space. But hubs can be weak points, so it’s best to avoid them in winter tents, which are more likely to be pounded by wind and snow.
Body
The two types of tent bodies you’ll encounter are single- and double-walled. Double-walled tents are more common: there’s a layer of mesh and nylon and a separate waterproof fly that extends over the top, creating space for airflow. That mesh makes these tents lighter and better for summertime, when you’re likely to be camping in warmer conditions, but beware temperature drops. More nylon is better for durability, and for blocking wind and dust, but adds weight. Any condensation collects on the fly and not on the tent wall, where it could dampen your sleeping bag, clothing, and other gear. A single-walled design uses just a waterproof wall, no fly. These tents tend to be lighter, but interior buildup of heat and condensation can be an issue, since they don’t breathe as well.
Floor
Tents with waterproof floors that extend a few inches up the walls are best. Look for ripstop nylon with a denier count of 30 or higher. Lightweight shelters have waterproof floors too, but designers shave ounces by making the base less durable. It’s always a good idea to add a “footprint”—an extra sheet of tarpaulin placed underneath the tent, protecting the floor’s exterior from damage. It needn’t be fancy; the blue hardware-store variety works just fine.
Fly
Ripstop nylon with a waterproof treatment is what you typically find here. Silicone-treated flies are tougher and add to the price tag, but they’re preferable if you camp in rainy climes such as the Pacific Northwest. For general use, choose a denier of 20 or higher. On some tents, the fly can be rolled back for venting and then quickly deployed if the weather changes. On others, the fly can be used without the body, if you’re traveling fast and light.
Capacity
Usually a tent’s name indicates how many people it can house. (For example, sleeps three.) And the lighter it is, generally speaking, the tighter the quarters. If you’re not concerned about the schlep factor, buy a tent with room for one more person than you plan to accommodate. Each occupant should have roughly 15 square feet of space.
Doors
A single door is acceptable for a two-person tent and, since it requires less materials, often means a lower price and lighter weight. But two is better, and for three people it’s practically mandatory. Large openings make getting in and out easier.
Vestibule
Dry outdoor storage is essential. About seven square feet per person is a good place to start. Vestibules should overhang enough that rain doesn’t land inside the tent when you’ve got the door open.