
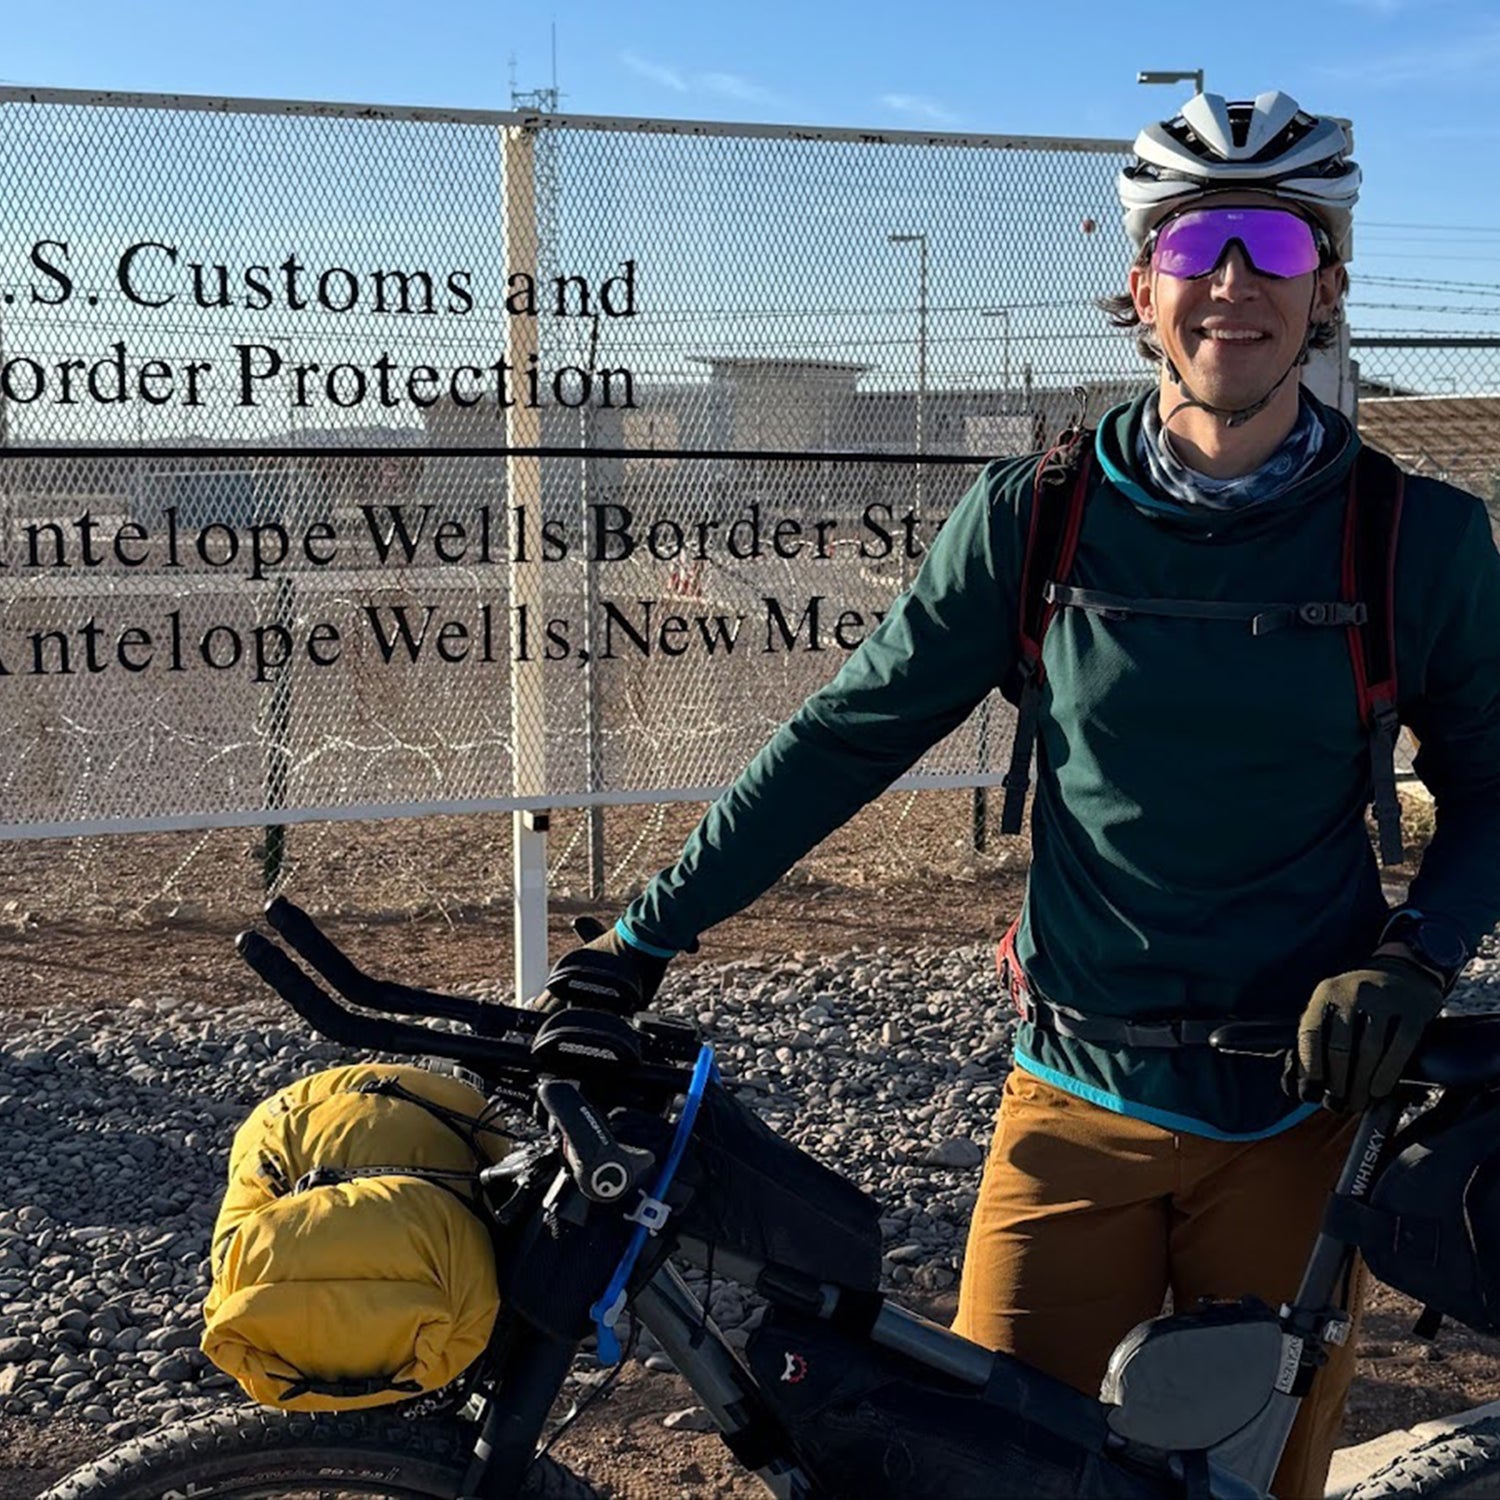
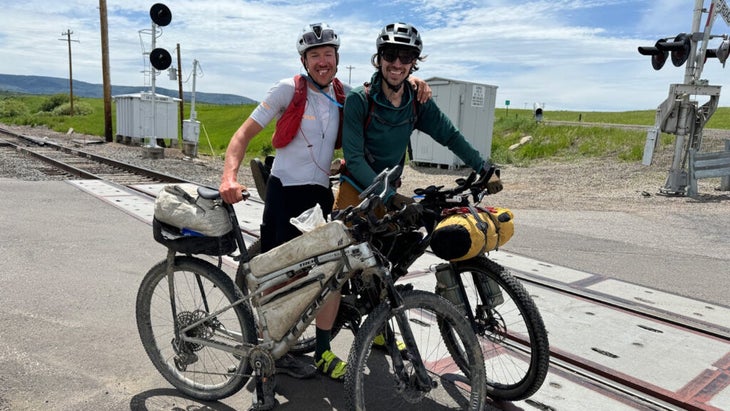
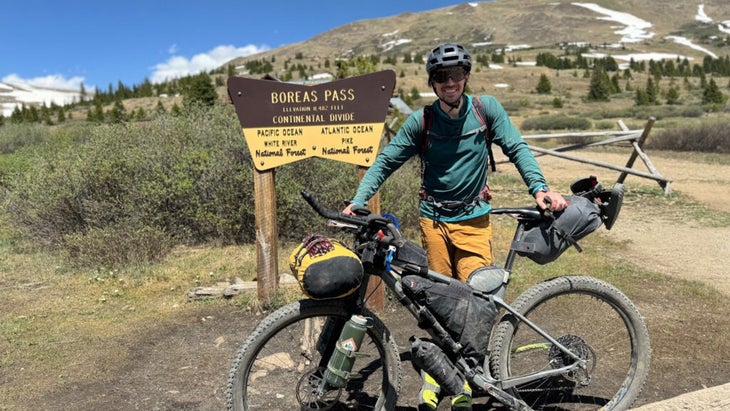
Earlier this Summer I spent 45 days riding the (GDMBR) from Antelope Wells, NM, to Banff, Alberta. The 2,700-mile journey was the longest trip I’ve ever taken—human powered or otherwise—and hands-down the most impactful. There’s nothing quite like traveling by bike, passing through some of the most beautiful parts of North America, and relying on nothing but yourself and your gear.
Adding to the magic of the ride was the GDMBR’s storied history. The started mapping the route in the 1990’s, and while it can be done solo and at a leisurely pace, it’s best known in the context of the , an annual competition that turns the GDMBR into a grueling, ultra-distance race course. Racers typically finish in around 20 days—though the record, , is now 13 days, 2 hours and 16 minutes.
All bikepacking trips tend to be pretty gear intensive, but that’s especially true on the Divide given how long and remote it is. The route consists mainly of dirt and gravel roads, and cell service is spotty. It’s typically two to three days between resupply points, which makes packing and planning crucially important. I also chose to do the trip with a lightweight bikepacking setup rather than heavy panniers, which seriously limited the amount of stuff I could bring.
In an effort to maximize efficiency, Tour Divide racers go to great lengths to make sure their bikepacking kit is absolutely perfect. I wasn’t racing, but any time spent dealing with mechanicals or mucking with gear that isn’t working properly is time you could be riding or resting, so I wanted my setup as dialed as possible.
Here’s a breakdown of the gear I used to get myself from the Mexican border to Canada on my bike—plus some insights as to what worked and what didn’t. For the sake of organization, I’ve split this review into a few parts:
- Bike and components
- Bikepacking bags
- Sleep setup
- Electronics and navigation
- Others odds and ends
If you buy through our links, we may earn an affiliate commission. This supports our mission to get more people active and outside. Learn more.
Bike and Components
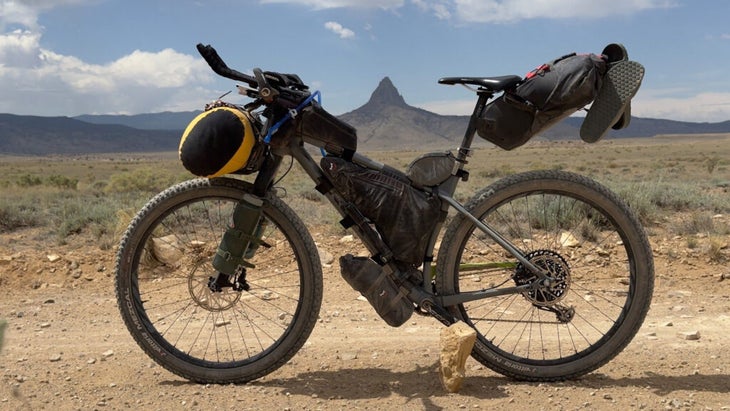
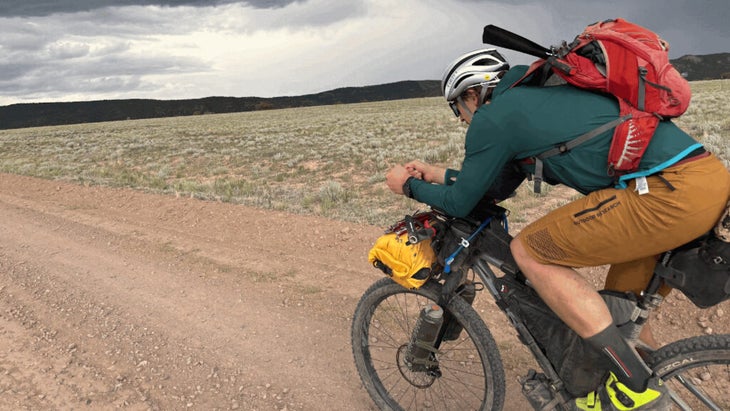
After a lot of deliberation, I chose to ride my trusty on the trip, and couldn’t be more happy with my choice. I swapped out the larger, 3-inch tires for a set of smaller and faster-rolling (which is what the vast majority of folks racing the Tour Divide use). I also swapped the dropper post for a rigid one, a choice that paid off in both weight savings and reliability. Even on long stretches of washboard and rocky train, the 29×2.6-inch tire (paired with the bike’s carbon frame, fork, and wheels) made for a surprisingly comfortable ride.
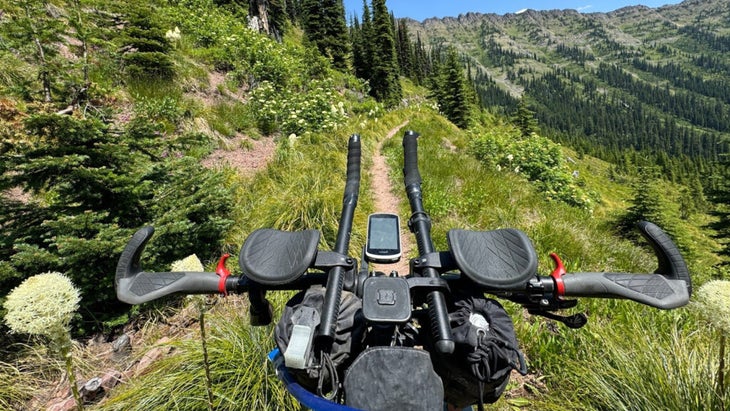
One major change I made was swapping the suspension fork for a rigid one. Trek’s shares the same frame as the Stache, so the fork transferred over. That allowed me to bolt on two , where I carried two 1.5L Nalgene water bottles. But, more importantly, the swap let me use Trek’s 1120 front cradle. In the past, I’ve used a handlebar roll on my bike, but the cradle allowed me to simplify things and strap a lightweight dry bag to the bike with two . I was able to fit more gear up front on the bike without interfering with brake and shifter cables or the steering, and there was absolutely zero play in the setup.
The GDMBR is a very long route, and oftentimes people run into comfort issues like hand numbness and shoulder and neck pain. To combat that, I added and a set of . I also added a pair of to the mix. All of that gave me four really solid hand positions that I was constantly switching between, and I didn’t have any comfort issues.
Bikepacking Bags
My bag setup was very similar to what I used on the Colorado Trail in 2019. One big update: adding the . This seat bag was incredibly spacious, and it allowed me to cram significantly more stuff in it than I’ve been able to with dropper post-compatible bags in the past. It mounts to the bottom of the bike’s saddle, and attaches via a clever pin system with an added strap. It never so much as wiggled, yet it popped off the bike in seconds at the end of the day.
I also used a , which was specifically designed to house a . I was able to fit my Jetboil, plus some heavier items like my repair kit and a small bike lock, without issue.
In addition to the other bags, which let me store the rest of my kit while maintaining weight distribution, I also carried a small where I tried to keep lightweight stuff like drink mixes, freeze dried meals, and charging cables, and generally keep as much weight off my back as possible. That strategy has worked for me in the past, and worked wonderfully on the Divide.
Sleep Setup
- +
I chose to bring gear I’ve used for years, like my bag and pad, because I trust them and know they’ll keep me comfortable. After all, sleep is important for recovering after 8 to 10 hours on the bike every day. My was overkill when I started in Southern New Mexico in early June, but I needed every last bit of the warmth by the time I ran into snow around the Colorado border.
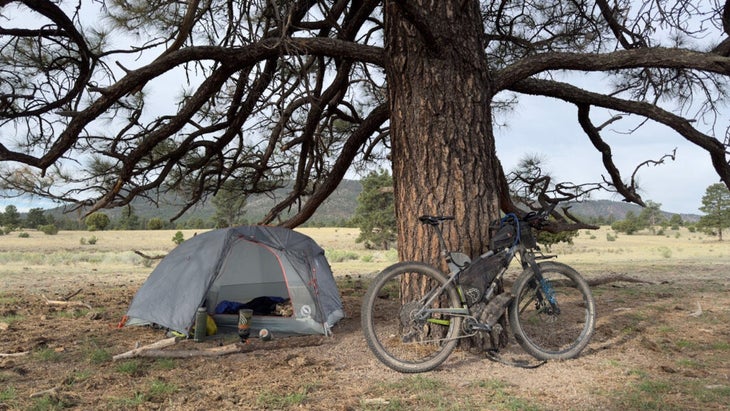
I spent a lot of time researching and testing tents for the trip since I’d be spending so much time in one, and ultimately settled on the . I prefer a freestanding tent for the ease of pitching, and the Copper Spur is one of the best I’ve ever used. It was plenty roomy for my 6’4” frame thanks to vertical bathtub walls at the head and foot, and the massive vestibule had plenty of room for all my gear during the storms I rode out. There were several times when I had to quickly pitch just footprint and fly because I’d misjudged the weather, and I was able to pitch the tent itself from underneath the fly, keeping me and most of my stuff dry in the process. The Copper Spur had great airflow, so I never dealt with the condensation issues that often plague single-wall setups. At just over 2 pounds, there’s no weight penalty, either.
Clothing
- and
The real hero of my trip was my . It was the perfect layer both for deflecting sun amid boiling midday heat and staving off the cold on chilly evenings. I wore it every single day for 45 days, and it never failed me. The hood is generous enough to fit over a bike helmet, and the lightweight material has yet to show any serious signs of wear.
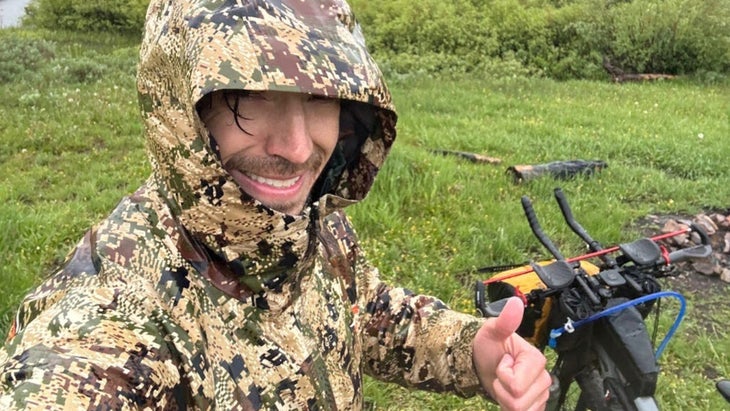
I also brought a full rain suit, and I’m glad I did. You’re almost guaranteed to see the full spectrum of weather on the Divide, and the and were the perfect blend of lightweight packability and serious waterproofing. It rained a lot on my trip. A lot of folks I met brought just a rain jacket in an effort to save weight—and kicked themselves the whole time.
Electronics and Navigation
I used my phone and a as my primary navigation devices. I upgraded to an right before my trip for a couple of reasons: The battery life, which Apple says offers up to 29 hours of video playback or 95 hours of audio playback, is significantly improved over my older iPhone 13, and the camera is far better, as well. I also went with the Pro Max for the larger screen, which gives you more real estate when using mapping apps. Although I never had to use it, I also upgraded because I wanted the SOS feature as a backup.
I mounted my phone to my bars using and , which kept it extremely secure while on the bike but let me quickly pop it off when I went into a store. I was blown away by how secure it was on technical terrain, and I never had an issue in 2,700 miles.
The other crucial piece of gadgetry was my . It served as my primary communication with my wife and family members whenever I didn’t have cell service (which was a lot of the time). I was most impressed by the battery life: even with location tracking turned on, I only needed to recharge it a handful of times in 45 days of constant use.
Other Odds and Ends
- 1.5L Nalgene bottles
- in frame bag
- and bladder
- Chain lube and rag
What Would I Do Differently?��
- Carry a full-size multi-tool from the get-go. (I replaced my mini Leatherman with a larger version about halfway through my ride.)
- Pack an extra shirt and pair shorts for in-town days and rest days.
- Replace bearings and pedals before the ride.
- I swapped the road helmet and glasses I wore originally for a and glasses in Salida. I wish I’d worn them the whole time for more coverage and the visor.
- Pack waterproof gloves for rainy-day riding.
- Bring a wall charger.
I originally packed a lightweight, synthetic t-shirt and running shorts, but ditched them early in the ride when my friend met up with me. In hindsight, I wish I’d hung onto those, because it would’ve been really nice to change into them while doing laundry or resupplying during a town stop. The point being: on a long trip like the GDMBR, a few luxuries are worth the extra weight.
Looking back, I wouldn’t have changed a thing about my bike setup, and I think a hardtail is absolutely the way to go for a trip along the GDMBR. Despite having a reputation for being a relatively mellow route from a technical standpoint, I can’t imagine doing it on a gravel bike. I chatted with lots of riders along the way who saw my setup, and they wished they’d gone with wider tires and flat bars in lieu of their skinny rubber and drop bars.
The kit I brought with me worked so seamlessly that it faded into the background and let me focus on the ride. More than any other trip I’ve taken, this one reinforced the idea that life is about experiences, not stuff—but the right gear can definitely make those experiences better.