

How to Make the Ultimate POV Film
You just purchased your first GoPro, and you’re ready to go out and create a jaw-dropping masterpiece of a video of you doing your favorite extreme sport. You strap on your camera, jump on your mountain bike, and you’re off. Couldn’t be easier, right?
Unfortunately, if you’re anything like me, the first video you create will not live up to expectations. While actually skiing an icy trail or bombing down some sweet singletrack may get your blood pumping, your audience won’t be able to share in that thrill if you can’t communicate the experience to them.
Popular POV films fall into four categories; , , , and .
Bad videos are easy to recognize, usually by the low number of views. They’re poorly thought-out and leave the viewer confused and wondering what just happened. The lucky videos depend on chance (e.g. you run your camera and get the chairlift or ). The “impossible to screw up” category is similar: If you’re skiing off a cliff with a parachute, you’ll probably get some compelling footage.
But you don’t have to be a world-class athlete to make an interesting, watchable POV video. You just need to be able to apply some basic filmmaking and editing skills to your raw footage. Here, we explain how, with tips from some of the top adventure filmmakers in the game.
POV 101: Plan it Out
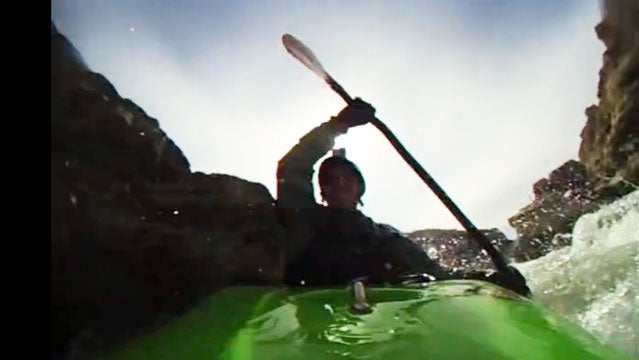
was shot entirely with a POV camera by Aaron Mulkey, an amateur videographer. Yet it flows seamlessly because of the huge amount of planning and prep work the creator put into it. Mulkey planned over 25 placements and camera angles for that film before he even started charging his camera. That meant knowing exactly what he was going to shoot before he shot it.
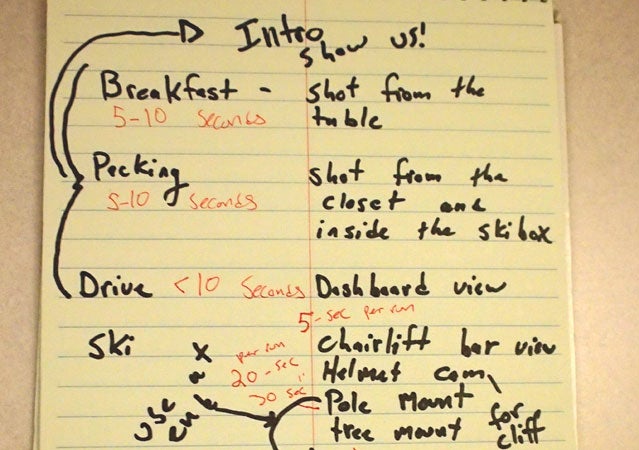
No matter what the subject of your film is, two low-tech tools will help you make it better: a pen and a notebook. Before you leave your house you should have your entire video written down. How the video will start, what the transitions will be like, what you’re going to do, how the video will end, what the background music will be, how many times you’ll have to do a certain thing to get the right footage from various angles. In short, you want to do all the creative work on paper, so that when you’re outside with the camera, all you have to do is get the right footage to tell you story.
“Anybody can go on any adventure these days with either a or an iPhone and make an amazing video story out of it,” says filmmaker Renan Ozturk of . “It depends on what you’re after, but a lot of people just want to share their stories and experiences, and to do that you have to think more like a filmmaker, and regard the GoPro as a real film camera.”
POV 101: Tell a Story
“Good stories have conflict, so in an outdoor movie that will generally mean an obstacle to overcome. Make the action of your movie into an objective,” says Patrick Carroll, an assistant video editor for the firm of Wieden and Kennedy. “Build the groundwork for your story by introducing the characters and telling us what they need/want to achieve. Show us what kind of challenge they face. Get to the actual event itself, the mountain or the trail or wave, whatever. Show the failures and then, finally, the resolution. Did they achieve what they set out to do? Are they coming back for more?”
Let’s use “” as an example of all of Carroll’s points. Mulkey introduces himself as he wakes up. He shows us his bedroom, a personal place, then shows himself getting into his car. Neither of these are exciting scenes, but they set the character and location for us.
“Even if it seems weird, the small little segments, maybe only two seconds, really help create the storyline, while having it on a helmet for five minutes doesn’t do nearly as much,” says Mulkey. ”I tried to think out a storyline in my mind. How will I plan my day, what will I do, what do I want to accomplish in my video and then plan each of those segments. It requires a lot more work than just going out and climbing for the day.”
When you’re planning your film, answer each of Carroll’s questions on a sheet of paper:
- How will you introduce the characters?
- How will you introduce the conflict/challenge?
- How will it be achieved?
- What camera angles will you use?
None of these scenes need to be complex. A simple, “My name is, and I’m going to ride that.” is plenty. Introducing the characters can be as simple as a few snatches of conversation as you pack up your gear or get ready. But that little bit makes a world of difference in differentiating your film from the mass of helmet-cam footage already clogging up YouTube.
POV 101: Get Creative
Everyone I talked to about POV filming said the exact same words: Get creative. Josh Madsen of films put it most succinctly: “Try using your camera with different mounts. People are tired of the same old POV shot. Mix it up by thinking of the POV camera as a true camera and get creative with how you shoot with it.”
Us mortals have to use our creativity to make up for our inability to jump 40-foot cliffs, do backflips on motocross bikes, or add a parachute into our regular routine. Luckily, a small, waterproof POV camera makes this only a challenge of imagination. Hula-hooping isn’t known for being a wildly exciting sport, but has over a half a million views on YouTube. Why? Because instead of wearing the camera, or placing it on a tripod, this woman mounted it on her hula hoop and gave us a unique perspective on an everyday activity. (Notice that she didn’t edit out the footage of her turning on the camera, giving us a few seconds to see her face as setup before the start of the action.)
A big part of finding creative camera angles is going to depend on what activity you are doing. Helmet cams on skiers tend to be more shaky than chest mounts, while chest mounts on bikes can lead to . Experiment and find the mount that best conveys your voice and story.
Once you sort out your camera mounts, don’t be afraid to mix things up. Save your POV footage for a few seconds as you come into the jump, reach the top of the mountain, or slide into the wave. Be honest with yourself: If you’re not doing something that is jaw-dropping, you’ll need to place your camera somewhere unique. If you have a unique camera angle, you can often get away with a less-than-unique stunt.
If possible, make sure we see your face. Nothing helps convey an experience like someone’s facial expression. Whether you put the camera on your snowboard tip, at the end of a pole, or on your handle bars, showing us your face will help convey the experience.
Or show us someone else. “Try some shots with a skier skiing over a camera, or one placed in a small jug on the climbing wall, or have a buddy out in the waves as you surf by,” Carroll says. “If you are only filming stuff with the camera on the athlete, you are missing half the story.”
���ϳԹ��� of the action scenes, non-POV angles are great for setting the location and introducing the characters. Make sure when you’re planning out your story that you include some lifestyle shots. These can be taken easily by taking off your helmet and using it with the camera attached like a tripod. Put it on the bar as you relax at the end of the day. Get some footage of the sun rising or setting. Mount it on the dashboard of the car and show us what you look like when you’re not being awesome.
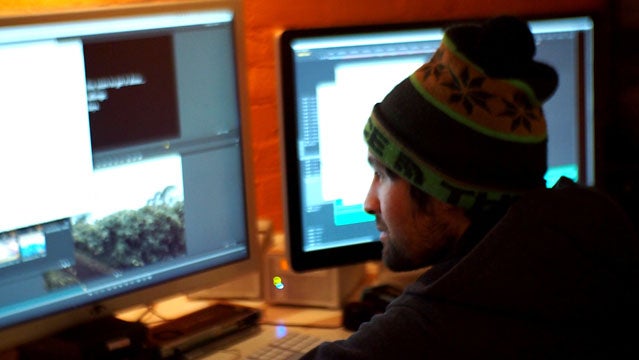
POV 101: Get the Right Software
As you’ve likely realized, that diminutive POV camera you have is a professional-quality tool, not just a toy. Does this mean you need to throw down for professional-level editing software? Probably not. For the most part, software like Final Cut is designed for manipulating video at a level well beyond what you’re going to need, and it’s not nearly as user-friendly as simpler programs.
What should you use? That depends on your OS and what you want to do. If you’re using a PC, you likely have a great video editor already: Windows Movie Maker. WMM is great mostly because it is really simple to use. Grab your clip, drag and drop it where you want, and adjust how much of it you want to show. Want to add music? Or narration? It’s right there. Boom.
Keep in mind that Windows Movie Maker may not want to play with the file format your camera uses (usually MP4). You can use free conversion software like MP4CAM2AVI to translate your footage to the right format.
For Mac users, the best alternative is iMovie, which you likely have preinstalled on your computer. If you don’t have iMovie, is another free and simple alternative that works great.
POV 101: Editing Your Film
The first rule of editing: Keep it short. You have four minutes, maybe five if you push it. We viewers are busy: We need to check Twitter, send emails, text, and make it look like we’re doing work, all at the same time. We don’t have time to watch anything long. That means cut.
If you have 10 seconds of you packing up your car, use three. Find someone who doesn’t do your sport and get their honest opinion on what to cut. Just because you think 40 seconds of ski waxing is exciting doesn’t mean your audience does.
That said, you still have to follow the arc of the story. This is the most difficult part of making a video, keeping the balance between action and lifestyle just right. Cut out what you don’t need, but make sure you leave the introductory parts in.
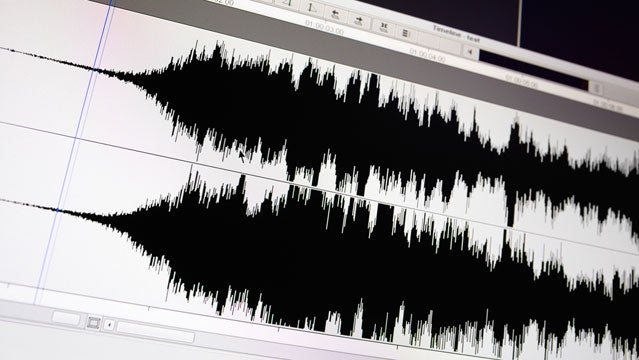
Audio is just as important as video. If you have crappy sound in the video, consider muting the recorded sound and just using background music. Find a piece of music with some rhythm (and it doesn’t have to be , , or ) and edit to that. Think of what the slow, dun-dun-dun Jaws theme did to all those shots of open water.
When it comes to transitions, less is better. Your video editing software will come with a ton of cool transition options (). George Lucas can almost get away with using them because, well, Star Wars. But you’re not him. You can fade in, fade out, or do a hard switch to the next clip. Nothing more. Ever.
Speed up the boring parts and slow down the exciting parts. If you need to, you can even shoot things you know will be boring (hiking, driving, packing) as a timelapse. Don’t be afraid to double back for a slow-motion shot either. If you’re pulling a trick on your skateboard, you can show it to us in normal speed, and then again in slow motion to really get the point across.
Finally, while a picture may be worth a thousand words, a few well-placed words can save a video. You can make grainy old archival footage work by adding narration or subtitles, so the video just has to work as a visual.
POV 101: Tips and Hacks to Make Your Movie Better
For anything you’re going to edit into slow motion, don’t worry about the resolution. The coolness of footage will make up for any loss of image quality you had to tolerate to get the frames per second up.
Mount your camera on an egg timer. The dial spins slowly, which gives you a great way to steadily pan.
If you’re going to be placing your camera all over the place, is cheap, strong, and plentiful.
Get a big memory card and keep your camera running. Sure, it’s not in your storyboard, but you might just get lucky. If you’ve got a camera running, you’ll catch the unexpected on tape when it happens.
Don’t hold the camera. Your hands shake, and with a lightweight camera we, the viewers, will notice. If you have to, stick the camera on a ski pole or other steady object.
Finally, go with your gut, and have fun. If you think any of the above advice gets in the way of your creativity or fun, ignore it. This is supposed to be a good time, and if you’re not enjoying yourself, what are you doing?