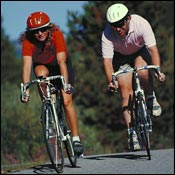
Time for spring! Time for the tulips to rise out of the ground, dandelions to wink cheerfully, the lawn to demand mowing every ten minutes (or so it seems), and the weeds to reappear the minute I turn my back. Ah, spring.
Road Biking
 Road Biking
And, time to haul the bike out from behind the snow blower and shake off the cobwebs. A little tune-up is always in order. And you dont need much to git er done. Some bike lube, a pump, a folding hex wrench, maybe a small adjustable wrenchthats all. Its helpful to also get at least the back wheel supported and off the ground. To do that, just string a sturdy cord from a garage rafter or other aerial support, then tie a loop in the free end just far enough off the ground so you can hook the bike saddle on it and have the back wheel an inch or so into the air. Id take things in this order:
Clean. Fill a bucket with some warm water and car-washing detergent. Dunk a terry cloth into the bucket and use that to wash down the bike: frame, handlebars, down tubes, wheel rims. Rinse gently (dont spray hard around the bottom bracket or the hubs) and towel dry. Now that the winter coat of grease and grime is off, give the frame a good look, keeping an eye out for rust (if its a steel frame), cracks, and dents. Twang the spokes like a harp to find broken ones. Look for frayed or rusty cables. Lift the front end up and spin the wheel. Eyeball it from above to ensure the wheel is true and not rubbing the brake. Use a cleaner such as Pedros Orange Peelz Degreaser ($10; performancebike.com) to clean the chain, wiping it down with a cloth afterward. Check for rust on the chain or bent links. Consider replacing it if its more than a year oldchains dont really last all that long. All good? Then go to step two.
Tune. First, check the tires for air or leaks. Inflate to recommended pressure. Make sure the quick releases are tight; there should be enough tension that they leave a mark on your palm when you push them into place. Next, shift all the way down to relieve all tension on the shifter cables. Use the hex wrench to loosen the bolt that holds it at the rear derailleur. Take some pliers, grab the end of the cable, and re-tension it through the bold. Tighten the bolt and check shifting. If you need help here, go to ParkTools.com for advice. Repeat for front derailleur if needed. Check for brake clearance and adjust if the pads are worn. If they are REAL worn, replace. Play” in the brake levers is partly a matter of taste. I like my pads to hit the rims pretty quickly. But you definitely want FULL lever pressure to result in FULL braking.
Set up. Double-check tire pressure for leaks. Use a drip-on chain lube such as White Lightning ($7; performancebike.com) on the chain, wiping off excess. Also spray a little White Lightning on clipless pedals and check engagement. Adjust saddle height as needed. Make sure your helmet still fits and hasnt been stored in the sun or an oven, and get out there and ride!
Check out ���ϳԹ���s picks for the . They all share one basic feature: fun!


