

10 Great Red Meat Recipes
To accompany our March 2013 Food Issue, which includes stories on everything from the Willows Inn, where 26-year-old chef Blaine Wetzel creates feverishly creative tasting menus using only ingredients found outside his back door, to the latest research on the destructive properties of fat, we asked Ari LeVaux, a restaurant critic who writes that has appeared in more than 50 newspapers in 25 states, to pull together 10 of his favorite red meat recipes.
The Food Issue
Browse selections from our March 2013 print magazine.- Chimichurri
- Churrasco
- Fruity Meat
- Wild Mushroom Sauce
- Plov
- Halfsies
- Garlic and Oyster Sauce
- Steak Tartare
- Over Wood Coals
- The Final Ingredient
Red Meat Recipes: Chimichurri
The Food Issue
Some meat cooks love their marinades. But I say, invest in the meat, not the marinade. If the meat is good, there’s no need to cover it up.
If anything, I’ll serve my meat simply seasoned but with a nice sauce, like this Argentine chimichurri, a garlic-and-herb vinaigrette. Serving meat with sauce puts the diner in control of how strongly seasoned their meat is.
Chimichurri is best prepared at least a day ahead so the flavors can develop. It will continue to age nicely for a few days in the fridge. Applied to fire-cooked meat, the spicy, oily, acidic fragrance of the chimichurri interacts with the lightly charred, crispy, smoky exterior of the meat to create a lovely contrast.
To make chimichurri, dissolve one teaspoon of coarse salt into a half-cup of water. Chop a head of garlic, a cup of fresh parsley, and 1/4 cup fresh or dried oregano (or marjoram), and add it all to a blender, along with 1 tablespoon crushed red pepper. Blend, adding 1/4 cup red wine vinegar and then 1/2 cup olive oil. Finally, blend in the salt water. Transfer to a jar with a tight-fitting lid and keep it in the refrigerator.
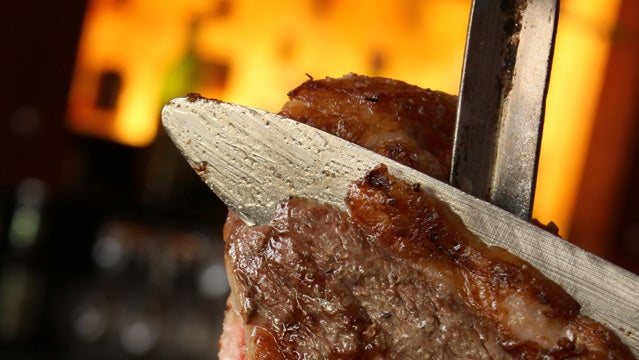
Red Meat Recipes: Churrasco
The Food Issue
I tasted my first churrasco, or Brazilian BBQ, across the street from the Sao Paolo bus station. As my buddy and I slouched in front of an endless parade of sword-skewered meat, the whole scene felt both so wrong and so right. Arguably, making like Jabba wasn’t the healthiest way to recover from a 10-hour ride from Florianapolis. On the other hand, after that meal I was so bloated with meat that our next leg, a 20-hour ride to Porto Seguro, seemed about the only thing I was capable of doing. The meal cost about what both bus tickets were combined, but it was worth it. Sanity is priceless.
Since then I’ve watched the march of the churrascarias, as the gaucho-style grilled meat has charmed hearts and bellies across North America. And while the array of lower price-point decoys like salad, sides, and desert can be quite impressive and distracting, the meat is why we go.
There are many styles of churrasco, and they all involve a mix of garlic, salt, and oil. And there are many ways for these ingredients to be combined with meat. I like to salt the meat directly, setting it aside and then treating it with freshly crushed garlic oil before—and during—cooking.
Use coarse salt, ideally sea salt. Sprinkle the meat on both sides, about a 1/2 teaspoon per steak. Don’t rub in the salt, just let it fall on the meat, and leave it at room temperature while you do the following:
Chop a head of garlic and then mash it with a mortar and pestle—or run it all through a garlic press, or whatever you have to do to thoroughly mash the garlic. Mix the garlic with a half-cup of olive oil. (I pour the oil into the mortar and crush it together, but I’ve got a stone mortar that’s so big they wouldn’t let me carry it on the plane home from Bangkok, so I can do that.)
Right around the time you get your fire going, brush, pour, or otherwise apply the garlic oil to the salted meat. When the grill is ready, add the meat. Baste lightly if you wish, but not so much the oil drips onto the coals and flares up, burning your meat.
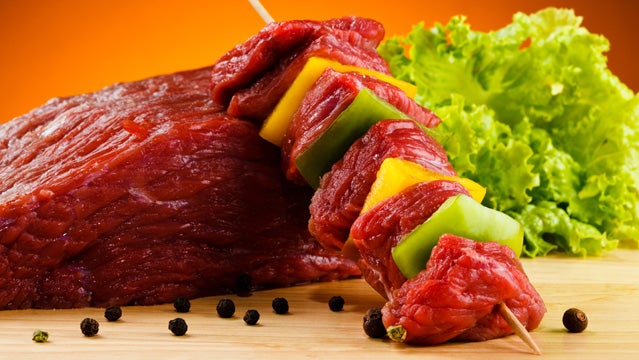
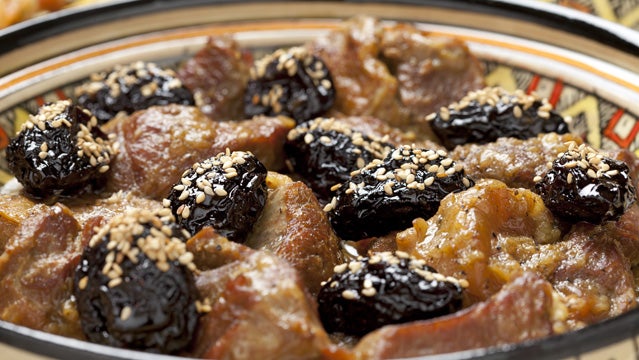
Red Meat Recipes: Fruity Meat
The Food Issue
From duck a l’orange to wine and steak to good ole’ pork chops and applesauce, there are innumerable ways for fruit and meat to mingle deliciously. In that spirit, I have a generalized recipe for cooking meat with fruit that can be used with most any kind of meat and most any kind of fruit.
The technique works for duck and pork, apples and oranges, although I employ it the most with stone fruits like peaches, apricots, cherries, and plums. No flavor of meat I’ve attempted with the technique has disappointed.
I’ll present the recipe in terms of beef and plums, but feel free to substitute other meats and fruits, and play around with seasonings.
Cut meat into one- to two-inch chunks. Sprinkle with salt and pepper and dredge in breadcrumbs or Japanese panko flakes. Fry slowly in butter, turning as necessary so that all sides develop a light brown crisp. When the brown starts to darken, add the peeled cloves of a head of garlic.
Resist the temptation to bail on the recipe and just start eating the fried, breaded meat. Instead, add pitted plums, either whole or chopped, and roughly twice the amount as meat by weight, to the sizzling, savory pan. The fruit can be frozen, dried, canned, or fresh. (If using dried, use less by weight.) After letting the fruit cook for a spell, add enough stock (veggie or chicken) to cover the whole business, and half a cup of sherry, Madeira, or white wine. Bake with the lid on at 300 degrees until the meat is spoon tender—the tougher the cut, the longer this will take.
Check your meat every 30 minutes or so, adding more stock or wine as necessary to keep it at least half covered. When it’s almost done, adjust seasonings with salt and pepper. Don’t add any more liquid, and allow the jus that remains in the baking dish to reduce to about an inch. Your fruity meat is ready to serve.
Red Meat Recipes: Wild Mushroom Sauce

The Food Issue
Given the price, you might not be buying a lot of fresh wild mushrooms from the store. But you want that wild fungus on your meat.
There are some simple ways to get those complex forest umami flavors onto your table and still leave enough leftover to buy that grass-fed t-bone. One trick, used by nearly any chef that promises you wild mushrooms on their menu, is to cut the wild mushrooms with cultured button mushrooms and other domestics. If you use three times the amount of domestic to forest gathered caps, the dish will still taste impressively wild.
Another option is to become adept at cooking with dried mushrooms, which are available all season and are more affordable. They actually cost more per pound than fresh, but when they’re re-hydrated they weigh a lot more. And dried mushrooms can hang onto their flavors impressively. I’ve still got gallons of dried morels I brought back from a picking adventure in Alaska in 2006, and they are not any worse for wear than when I first dried them.
The trick with using dried mushrooms is to properly rehydrate them. And by the time you finish this simple sauce recipe, meant to be served alongside meat, you’ll know how it’s done. I usually make it with morels, but dried chanterelles, porcini, and most any other will work too, as well as some buttons to cut them with.
Heat up some water or stock—about a half-cup of liquid per cup of dried morels. When it’s simmering, toss in your dried mushrooms. Simmer for 30 seconds and then turn off the heat and let them sit, covered, for at least an hour, gently stirring occasionally to ensure even contact between mushrooms and liquid.
A common mistake is to soak dried mushrooms in too much liquid, which pulls most of the flavors into the water, which is then discarded. Instead, you want to use just enough soaking liquid so that there’s only a small puddle of it on the bottom of the pan. If there’s no liquid at all, that means the mushrooms soaked it all up, and could probably take more.
Depending on their size and your preference, slice the mushrooms or leave them whole. Sauté them in butter with chopped yellow shallots or onions, which you can add at the same time as the mushrooms. Now is also the time to add supplementary button mushrooms if you’re augmenting.
The mushrooms and onions will initially give off a bit of water. Keep cooking, and as the water dries up begin adding sherry, and more butter if you wish. Every time the pan starts to dry out, add more sherry, stirring constantly. You can do this for a long time: as long as nothing burns, you can’t really overcook a morel.
Season with salt, pepper, and pinches of nutmeg until you can almost taste it. For a heavier, French variation, add heavy cream and lemon at the end, two minutes before removing from heat. Serve the wild mushroom sauce directly with your meat. Alternatively, toss it into wild rice with crushed almonds for a hearty side dish.
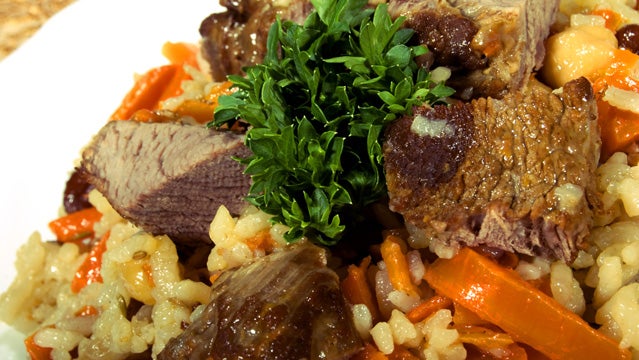
Red Meat Recipes: Plov
The Food Issue
Plov, the root of pilaf, is a Central Asian dish of meat, carrot, garlic, onion, and rice. Traditionally its preparation was the exclusive province of men, and a recent informal survey suggests that remains the case. A Tajik college student I spoke with told me she thought women wouldn’t add enough meat if they were in charge of plov. An Uzbek man named Hosiljon Rakmonor turned my question around so effortlessly that women making plov seem no more possible than man making baby.
“Can women make plov as well as men?” I asked Rakmonor. He folded his hands behind his back. “If a woman wants to eat man’s plov” he said, “they must order their husband or their brother to make it. That way, they can eat with pleasure. If you want to eat something that is prepared perfectly, you must have the master prepare it. Man is the master of plov.”
I’m skeptical of this idea, for what it’s worth, and invite women everywhere to see what they can do in the plov department. And to bring me samples.
Of the meats typically sold in stores, “stew meat” is usually the toughest, and that is tender enough for this recipe. If you’re using a truly tough cut of meat, braise it ahead of time so that it’s soft before proceeding.
Soak two cups of long grain brown or white rice in a pot of water. Fry a pound of meat, cut into chunks, in olive oil on medium heat. When the meat is crispy all around, add an onion, minced, and a chopped head of garlic, and carrots that have been chopped into whatever size you wish. Stir occasionally, seasoning with salt, pepper, and spices like clove, nutmeg, and coriander if you wish. When the onions are caramelized, pour the water off the rice you have soaking, and spoon the soaked rice onto the meat and veggies. Don’t mix it in, just add the rice on top. Then add water to the pot so it just covers the rice, and then add a cup more of water.
Cook on low until the rice is done, adding more water if necessary. When the water is gone from the pot, and the rice on top is cooked, turn off the heat and let the plov rest for 20 minutes. Invert the pot onto a plate, so the meat and goodies are on top, and serve.
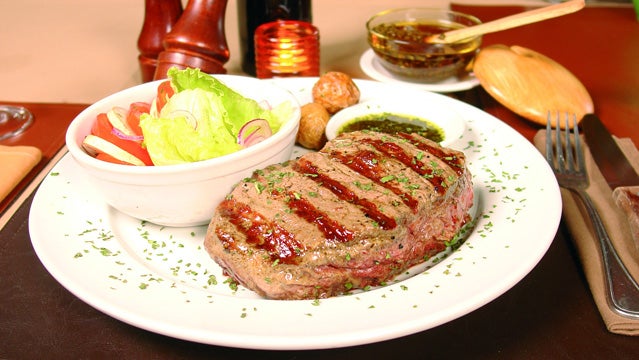
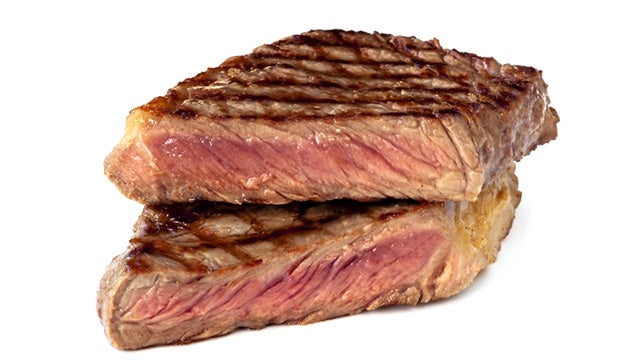
Red Meat Recipes: Halfsies
The Food Issue
You should never be afraid or unwilling to cut meat in half. Knowing how well the meat is done in the center must take priority over the meat’s unblemished presentation. A meat thermometer would do the trick too, if you have one. But truth be told, I enjoy cutting meat in half.
My halfsies technique is ideal for hefty cuts of tender meat that you start cooking and then suddenly freak out about overcooking. But halfsies can also be your plan from the get-go. It’s a technique that allows you to slow the pace when necessary, and then speed it up when it’s time to eat. And it works in any steak cooking context, be it grill, broiler, or pan. With halfsies, the meat will be perfectly done, exactly when you want it to be, and already be cut into pieces.
Start with a steak, ideally one that’s at least two inches thick. I cook with a lot of wild game cuts that are often mound or tube-shaped, but most any shape will work. Rub the meat with oil and sprinkle with salt and pepper (or use any other marinade or rub you wish). Place the meat in your cooking context—pan, grill, or broiler—on low/medium heat. When the meat looks done on the outside, cut it in half.
Inspect the cut side for doneness. After the first cut it should be mostly raw red inside surrounded by a thin browned crust like a piece of seared tuna. Place the two cut sides facing the heat. When the raw, cut sides appear cooked, cut each piece in half again, checking the cut sides for doneness, and orienting them so the four cut sides all face the heat. Repeat as necessary.
With each cut, the revealed flesh will progressively change from dark red to pink. When the cuts reveal meat that’s almost done to your liking all the way through, remove from heat. It will continue to cook until you eat it, so it’s important to remove the meat a hair early.
The halfsies technique is ideal for situations where you’re alone or with guests who are comfortable around each other and beyond any pretense of fanciness. In fact, it’s often employed while standing around a grill, or pan, with a glass of wine in one hand and a jar of your favorite steak sauce on the counter. All the cutting creates many opportunities for sampling the goods, when the meat is both perfectly done and perfectly hot.
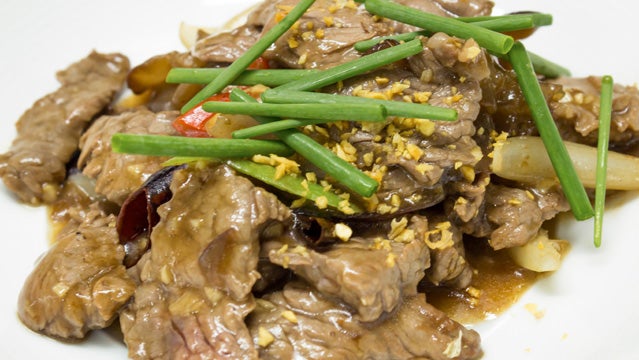
Red Meat Recipes: Garlic and Oyster Sauce
The Food Issue
Oyster sauce is a brilliantly conceived ingredient that, more often than not, is poorly produced. Traditionally made by simmering oysters in water to extract their deep umami flavors, today all but the most expensive or homemade recipes of oyster sauce contain shortcuts devised to create a similar flavor and effect more cheaply. Sugar, cornstarch, and MSG are making up for quality or the amount of actual oyster product in the sauce. At the very least, look for brands in which these three are as far down the ingredients list as possible. Or maybe you can find the good stuff, pregnant with the distilled essence of the ocean’s nooks and crannies.
Oyster sauce with meat and garlic, and usually something green like broccoli or snow peas, is a classic and elegantly simple Chinese dish. It’s most often made with beef, but can be made with lamb, wild game, and non-red meats like chicken or bacon.
Cut the meat into chunks or dominos and brown them in the oil with the heat on low/medium, stirring as necessary. When the meat is browned, toss in the prepped greens—florets, pods, cabbage, asparagus, whatever you got. Carrots work too. After adding the veggies, pour 1/4 to 1/2 cup of sherry or other white wine or water into the pan to deglaze it, and stir around the meat and veggies along with the fond scraped from the bottom.
Put a lid on the pan to steam the greens. Let them steam just a minute or two, then add minced garlic and lots of black pepper. Stir it around, and finally add the oyster sauce—about 2 or 3 tablespoons per pound of meat. At this time you can also add fresh basil leaves and some kind of chile or hot sauce, if desired. There should still be a shallow, rapidly evaporating puddle of liquid in the pan. If not, add another heavy splash of wine or water. Stir again, making sure the oyster sauce is evenly dissolved and everything is coated with the sauce, and put the lid back on the pan and turn off the heat. Let it rest for five minutes before serving, with rice.
Red Meat Recipes: Steak Tartare

The Food Issue
When war correspondent and author Thomas “the Turk” Goltz isn’t in the trenches of Chechnya or the presidential palace in Tbilisi, he’s at home in Livingston, Montana, where he likes to eat meat and keep his drinking muscles in shape. A haven for writers and epicureans alike, Livingston, and Goltz’s house in particular, was a great place to spend my birthday a few years back. Before the guests arrived, Goltz taught me his steak tartare recipe.
A multi-generation Montanan, Goltz eschews beef for passionately held ethical reasons. Luckily, there are many other tasty animals running around the area that he has no problem eating. That day we used deer. I’ve made this steak tartare with all kinds of red meat since, but I still like deer the best.
Whichever meat is used, it should be frozen first as a precaution against parasites—two weeks in the deep freeze is a good rule of thumb. If you’re buying your meat, it should be as fresh and high quality as possible.
Mince or grate a tender cut of meat that’s partially thawed but still mostly frozen. For every pound of meat, mix in a tablespoon of minced capers, a tablespoon of horseradish or mustard, a tablespoon of paprika, a shot of brandy, salt, pepper, and a yolk from a good egg. Mash together, taste, and adjust the seasonings. The paprika gives the tartare an extra bright redness, which seems appropriate to this very raw meat.
Plate the tartare on a bed of thinly-sliced onions, with a garnish of parsley, and serve with crackers or toast.
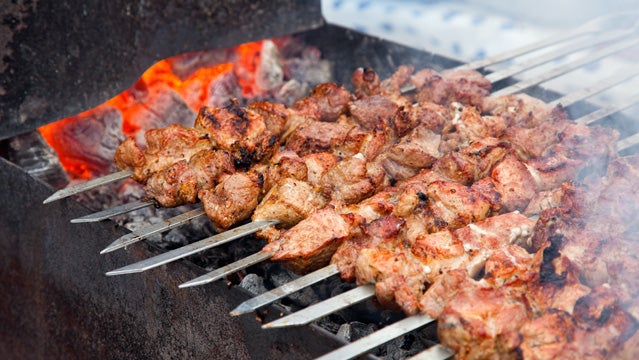
Red Meat Recipes: Over Wood Coals
The Food Issue
Cooking steak over wood coals is romantic. It’s authentic. It’s elemental. It’s simple. It’s also very easy to screw up. A common rookie maneuver is to put the meat over a fire that hasn’t burned down to coals. This exposes your meat to licking flames that will likely char the food beyond where it’s a good thing. And the smoke from freshly burning wood is more bitter than from coals. Both smoke and charring add flavor and complexity to meat, but too much charring or smoke and that’s all you taste. You want these flavors to be team players.
The choice of wood makes a big difference in how hot and quickly it burns, and how the smoke tastes. In general, hardwoods are better for cooking over than soft woods. Apple is perhaps the king of woods. It burns hot without too much flame, and has sweet smoke. Cherry is up there with apple. Alder burns more quickly and with less heat, but has good flavor.
Assuming you’re using wood of roughly two-inch diameter, a good rule of thumb when cooking over wood is to start the fire about 45 minutes before you want to cook. When the wood burns down to coals, spread them evenly under your grill grate and wait for them to cover over with ash.
While the fire is burning its way down to coals, salt a room temperature steak, and let it sit.
The grill should be three to four inches above the coals. You should be able to hold your hand at grill level for about two seconds before the heat forces it away. Grease the grill with a piece of fat or oil. The meat should sizzle softly when you set it down. After five minutes rotate the steak 90 degrees to make a crosshatch pattern. After four more minutes turn over the steak and repeat the process, turning it 90 degrees after five minutes. After that turning, an inch and a half thick steak will need roughly another two minutes to be medium rare inside. (or take away the guesswork by using the Halfsies technique).
Red Meat Recipes: The Final Ingredient
The Food Issue
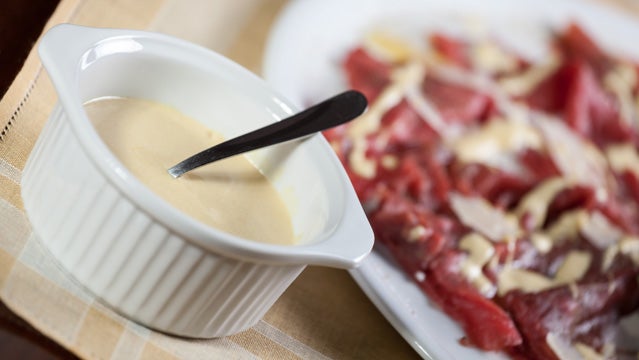
One could argue that a glass of red wine would be a good companion to all of these aforementioned dishes. And to be honest, the glass was there as I tested them. While I ate the meat, the wine was in my mouth. So in the spirit of full disclosure, there was a silent ingredient in my versions of these dishes as well. And this final recipe is for that sauce.
You’re either on board that mayonnaise is awesome, or not. And if you’re not, then do us both a favor and stop reading now. You’re hardly alone, so go find some of your own people to play with.
If you’re still reading, then you know what’s up with mayo. And maybe you’re like me, and put it on everything. Below, I’ll share my recipe for homemade mayonnaise, but first I have to get something off my chest. I prefer my brand of store-bought mayo to my totally awesome homemade mayo.
Not only that, but my preferred brand is not even real mayonnaise. It’s an egg-free vegan brand called Vegenaise. I know it sounds crazy, but every one of my recipes was enjoyed with a dollop of this white creamy goodness, this deliciously inviting fake mayonnaise.
I understand that can be a lot to handle, even for the hard cores, but there you go. And now, for those who don’t believe me, my homemade recipe. Most mayo is made with just the egg yolks. This recipe is more of a “camp mayo,” not as thick as some, but way less of a hassle.
Crack two whole eggs into a blender, along with a teaspoon of mustard and 3/4 teaspoon of salt, and blend for one minute. With the blender going, slowly add a cup of oil (I like olive or sunflower), beginning with just a thin stream. As it starts to thicken, you can increase the flow of pouring oil. When the juice runs out, and the motor is still running, quickly add 4 tablespoons of lemon juice and vinegar (2 tablespoons each). Turn off the motor as soon as it’s blended. Stir in other seasonings you may desire, such as pressed garlic. Store the unspoken final ingredient in the fridge, and put it on everything.
Remember: raw eggs may contain salmonella microbes. As a precaution, you should rinse the outside of the eggs before you crack them. If you have a depressed immune system, you might want to avoid homemade mayo, as well as homemade eggnog, or even sunny-side up eggs—which they no longer serve in nursing homes for this reason.