


It’s the end of a strenuous day of hiking and your crew has worked up an intense craving for sweets. They expect s’mores. You’ve got something even better. From desserts you can plan ahead to foraged findings, these recipes and ideas are anything but predictable.��
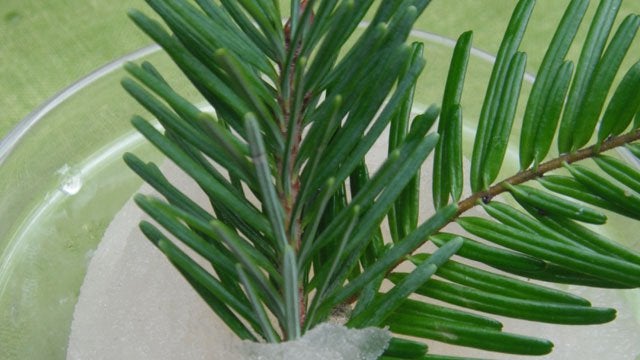
1. Fir Tip Sorbet
While solo kayaking the Inside Passage from Alaska to Washington and through-hiking the Pacific Crest Trail, wilderness guide, teacher and writer, Jennifer Hahn, kept her sea kayak and pack light by foraging for sea urchin, beach greens and boletes—among other delicacies. Her book, , details an array of dishes created from wild edibles.��
When Jennifer suggested a dessert made from pine for this article, I was intrigued. She starts our conversation with a question: “Ever crush fir needles in your fingers and inhale the citrus aroma? Turns out,” she continues, “evergreen tree tips—especially the soft, bud-green, spring needles—are packed with Vitamin C. Brewed into beer, spruce tips staved off scurvy on Captain James Cook’s 1773 expedition to New Zealand.”
Ingredients
- 4 cups fir tree branch tips
- 4 cups water
- 1 cup sugar
- Juice of one lemon
- 1 shot white brandy (optional)
Directions
- Combine in a medium saucepan: water, sugar and fir tips. Bring mixture to a boil, stirring to dissolve sugar. Simmer for 30 minutes.
- Reduce the liquid by half and thicken it to a syrup consistency. To test the thickness, put a few drops on a spoon. If it doesn’t run easily when cool, it is ready.
- Stir in lemon juice and white brandy.
- Cover with a tight-fitting lid and bury in a snow bank. Flag the spot!
- When chilled—but not frozen—drizzle the syrup over two mugs packed with crisp, clean snow. Stir well. Spoon up a forest of flavor!
A word of caution from Jennifer: Pine and fir needles are edible. Cedar and Pacific Yew contain toxins. Know your trees and pack a tree-ID book.��
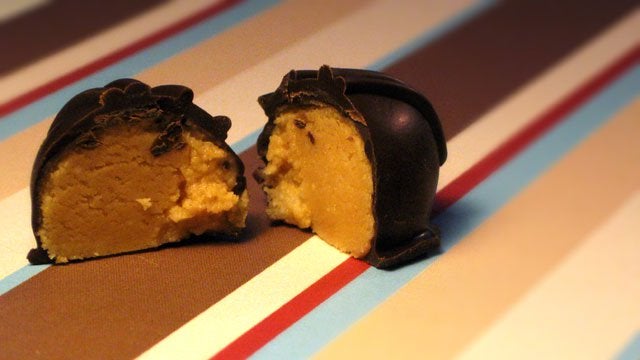
2. Fancy Schmancy Peanut Butter Truffles
Casey Pikla knows how to work magic in the backcountry kitchen. He should: Not only does he work for the National Outdoor Leadership School (NOLS) in their Professional Training department and as a backpacking and mountaineering instructor, but he also performs in front of the camera for the backcountry-inspired .��
Casey promises a peanut butter treat that is simple, yet delicious. Consisting of just four ingredients, he says it’s the “perfect thing to impress your girlfriend, boyfriend, in-laws, boss, tax auditor, or climbing partner in the backcountry.” This treat can be made in all seasons, with a winter alternative using snow to mold perfect truffle shapes.��
Ingredients (makes 10 to 12 pieces)
- ¾ cup sugar (brown or white depending on preference)
- ½ cup peanut butter (creamy for a smooth texture, crunchy otherwise)
- 3 tbsp butter, softened
- 6 oz chocolate or 1 cup chocolate chips, melted
- Optional: Cinnamon, honey, oats or any ingredients that tickle your sweet tooth
Directions
- To start, in a small bowl mix peanut butter, butter, sugar and any optional ingredients together until well combined. Roll out dollops of the peanut butter mixture into one-inch oblongs; set aside.
- Next, in a small pan melt your favorite chocolate. If you’re using a bar, either chop or smash into coarse pieces to quicken the melting process. “You’ll want to use a lot of tender love and care as you melt the chocolate, being sure to stir frequently,” he advises. As chocolate is easy to scorch, his trick is to “…remove the chocolate from the heat just before all the pieces are completely melted and allow the residual heat to finish the job.” Ultimately, you want a smooth consistency throughout.��
- Continue by rolling your prepared peanut butter balls in the melted chocolate. Set the balls aside on a container or pot lid to cool for about 20 minutes. Or as long as your capacity for civilized self-restraint will allow. Last, but not least, devour.
Winter truffles: Casey calls this the “fancy pants” version. It requires making truffle molds out of snow.��
“Simply form a tightly packed snowball and hollow out an inner cavity,” he says.�� ‘The denser you pack the snow the better as this will help yield a more consistent final shape for your confection.”
After snow molds have been created, place a prepared peanut butter ball in the center. Again, heat the chocolate so that it is just melted. “Too hot and it will horrifically disfigure your perfect little snowball mold; viscous, but pourable, is ideal,” he instructs.
Pour the chocolate into the snowball mold, covering the peanut butter core. “French accents and artful showmanship are highly encouraged at this step,” encourages Casey. “Let the truffle cool, then serve to wild applause.”
Before signing off, he says (in true NOLS fashion), “Be sure to dispose of any food bits properly. Leave No Trace still applies to fancy treats.”
Butter can stay good for a few days outside, or purchase powdered butter and rehydrate at camp if spoiling is a concern.
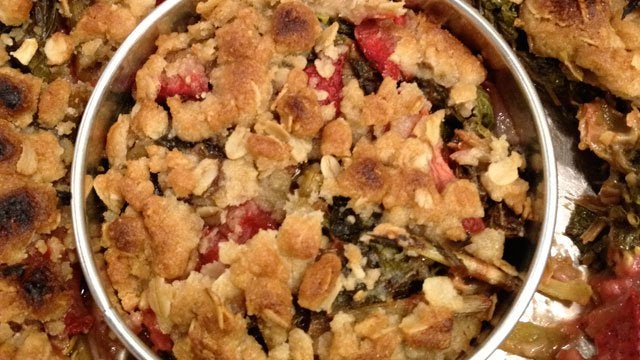
3. Wild Blueberry Crumble
Professional forager Tama Matsuoka Wong and Eddy Leroux, chef de cuisine at 3-star Michelin-rated Restaurant Daniel in New York City, co-wrote . Nominated for a prestigious James Beard Award in 2013, the book was featured by the New York Times, Wall Street Journal, Oprah Magazine, Martha Stewart Living, CBS Sunday Morning News, and others.
“There is almost nothing to compare with the flavor of wild foods and the experience of finding them for yourselves and then cooking with them,” says Wong. And with wild blueberry crumble on deck, who would disagree?
Wong and Leroux adapted this recipe from their book with ���ϳԹ��� readers in mind. Although the recipe calls for a large Dutch oven suitable for base camp, if you want to try it on the trail (and you will!), they suggest substituting a full-metal backpacking pot with lid.��
Ingredients
- ½ cup all purpose flour
- ½ cup light brown sugar
- ¼ cup granulated sugar
- ¼ cup old fashioned rolled oats
- A pinch of salt
- ¾ stick unsalted butter
- One lemon
- 1 pint (2 cups) berry jam
- 1 pint (2 cups) fresh berries—although wild blueberries are referenced for this recipe, Tama and Eddy note that “adding in a variety of wild berries will enhance the freshness and sweet/tangy flavor.”
Directions
- At home: Mix together the dry crumble ingredients and pack in a Ziploc bag labeled “Crumble.” Separately, pack butter and lemon in Ziploc bags. At camp: Mix the package of crumble with the softened (not melted) butter until it’s in big crumbles.
- In a large Dutch oven with a lid, throw in the jam and berries—including any found along the trail (wineberries, raspberries, blackberries and blueberries are nice). Add the flour and the juice of ½ lemon. Stir. Sprinkle the crumble on top the berry mixture.
- Put the lid on and place on a low-heat campfire. Pile a lot of hot coals from the fire to completely cover the lid for more even baking. Cook for 35 minutes or until the berries are bubbling.
4. Chocolate Cake Baked in an Orange

In addition to divvying up his time between cycling and making hot sauce, San Francisco-based food photographer, Chris Rochelle, is responsible for making the dishes on Chow.com look irresistible. One glance at his work and you’ll know he succeeds. To help you recreate that tantalizing desire amongst your trail mates, Chris shared a simple trick for baking chocolate cakes right at camp. If that’s just not enough, you can see more of his work at .
Ingredients
- Cake mix (amount dependent on number of hikers)
- An orange for each hiker
- Supplies: Tin foil
Directions
- Divide the oranges amongst your hiking buddies and get everyone to scoop out the pulp.
- Fill the oranges three-quarters of the way with chocolate cake batter.
- Put the orange tops back on and wrap each orange in heavy-duty aluminum foil. Place directly onto the smoldering coals of the campfire, avoiding any intense flames, and cook for about 30 minutes, turning once or twice.��
Along with the recipe, Chris offers a few tips. “It's okay to leave a little bit of the flesh inside the peel,” he explains. “In fact, it's nice because it infuses the chocolate cake with orange flavor.” If you will be arriving at camp late, you can cut prep time by mixing the batter at home and carrying it in an insulated flask. And, of course, who says dessert has to end the day? “These are nice to eat the next morning for breakfast too.”
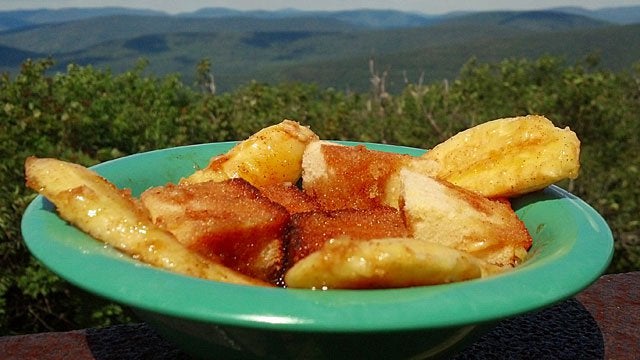
5. Bananas Foster—Trail Style
For those wanting to go the extra mile, try a little after-dinner flambé show. Chef Ronald “Ron” Loeber whips up top-notch treats for his outdoor excursions, which he shares on . He is the author of , created to “enhance your outdoor cooking experience.” After playing in the mountains of New York for 25 years and with over 15 years of professional cooking under his belt, Ron proves that trail food can “…not only be tasty, but also fun to make.”
This recipe calls for vanilla pound cake. You can purchase it ahead of time or make it yourself using Ron’s recipe at the bottom of this section. Either way, for this crowd-pleaser, you’ll need the following equipment: camp stove and sauté pan, knife, tongs (or fork) and a long-stem lighter for the flambé.��
Ingredients
- 8 1-inch cubes of vanilla pound cake (4 for each bowl; see following recipe)
- 2-bananas (Do not slice bananas ahead of time)
- ¾-cup of light brown sugar
- 2-ounces of banana liqueur
- 2-ounces of dark rum
- ¼-stick of butter (1-ounce)
- 1-tsp of pure vanilla extract
- ½-tsp of cinnamon
Directions
- Turn on stove to low heat. Place butter, sugar and cinnamon in a pan. Let sugar dissolve.
- Add banana liqueur and vanilla to the pan. Cut bananas lengthwise, then in half, and add to the sauce. Cook bananas for a minute on both sides.
- After bananas have simmered, gently add the rum to pan. Take the long stem lighter and ignite the rum; this should flame for a minute. Finally, add pound cake cubes to bowls and then add the bananas. Pour the remaining sauce over the pound cake.��
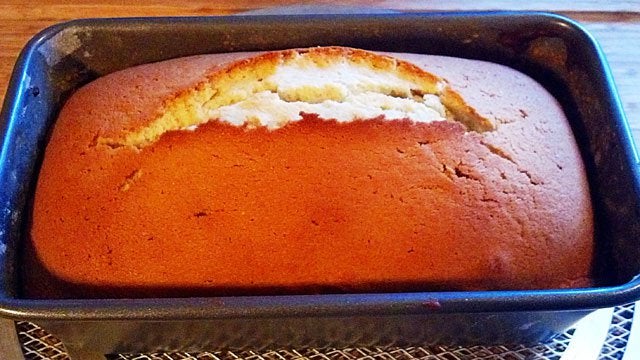
If you’d like to enjoy this as Ron would, bake up his vanilla pound cake from scratch and bring it along. To make this at home, you will need the following: electric mixer, 9 x 5 loaf pan, large mixing bowl, and a toothpick.
Ingredients
- 2 sticks of butter (1 cup) + 1 tbsp of butter for pan
- 2 cups of all-purpose flour + 1 tbsp of flour for pan
- 1 cup of sugar
- 4 large eggs
- 1 tbsp of pure vanilla extract
- ½ tsp of salt
Directions
- Preheat oven to 350°F and prepare the loaf pan by buttering and flouring it.��
- Add the butter and sugar to the bowl. Turn mixer on high speed, beat butter and sugar until light and fluffy. Add the eggs one at a time, beating well after each addition; add vanilla and salt. Next, turn the mixer to low and gradually add flour, beating just until combined (do not over mix).
- Bake for 45 minutes or until a toothpick inserted in the center of the cake comes out clean. Let cool on wire rack.
Ron triple ensures against leaks in his backpack by using small Tupperware-type containers, rubber bands, and Ziploc bags for the liquid ingredients. To make sure containers are sound, he tests them first with water and salvages any faulty canisters by placing a piece of plastic wrap between the lid and the bottom of the container. Next, he secures the lids with a rubber band and places the package inside a Ziploc bag; a foolproof way to get gourmet on the trail.
6. Bam! Chocolaty Banana
Love the sweetness of roasted bananas but want to try something on the simpler side? , Outward Bound professional guide and award-winning writer, takes her vegan tastes to the trail with this quick fix. “I'm always eager to show people how easy it is to be vegan in the backcountry,” says Kaki. “This gooey, warm treat packs easily, especially for cold-weather trips.” Bonus for being ultra-light on everything but flavor.
���Բ�����徱��Գٲ���
- 1 banana
- Handful of chocolate chips
- Optional: marshmallows, peanut butter, caramel sauce, etc.
Directions
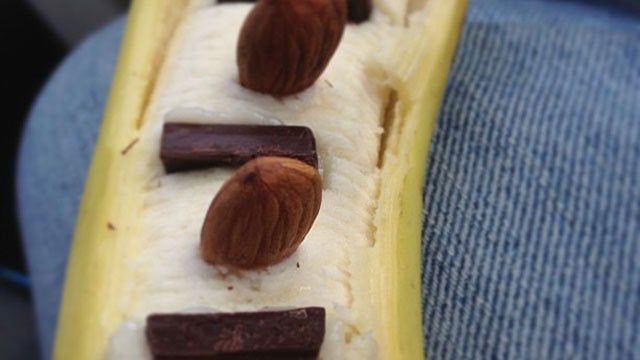
- Keep the peel on the banana. Using pocketknife, slit banana along the length, about halfway through. “You are creating a pocket,” inserts Kaki.
- Fill slit with toppings and cook for 10 to 15 minutes.
- When done, the banana and toppings will be warm and gooey. Eat right out of the peel, using your spork or chopsticks.
Kaki says that roasting by campfire works best. Simply find a place along the edge to place your bananas. “Resting on a rock as close to fire as you can works as well,” she adds. “Wrap in tinfoil if you have to, but works just fine without.” If you’re without a campfire, use your stove by placing bananas in a row in frying pan over medium/low flame and cover. Kaki loves the fact that there’s no cleanup with this recipe.�� “Just fold up your banana peel and bam! you’re done.”
7. Upside Down Chai Cheesecake
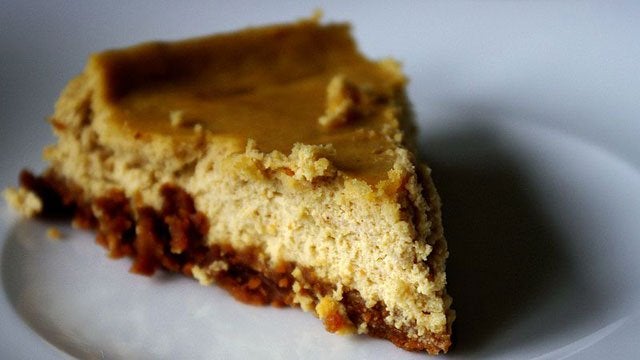
Warm, spicy chai: Both its aroma and flavor bring comfort on a chilly day. Combine with cheesecake and you’ve got a match made in culinary heaven. Savor this cool-weather fare on your next outing with a recipe from Teresa “Dicentra” Black, author of and owner of the site .��
While Dicentra believes that people should eat well in the backcountry, she also believes in making meals fun and simple. “You can eat delicious meals in the backcountry without too much effort,” she says. ‘”And you can do it in one pan!” Desserts are no exception. This recipe fixes up in a flash using instant cheesecake mix and cool temperatures—no stove required.
Ingredients
- 1 11.1 oz package instant cheesecake mix
- ½ cup powdered milk
- 1 teaspoon ground ginger
- ¼ cup crystallized ginger, chopped
- ¼ teaspoon nutmeg
- 2 teaspoon ground ginger
- ½ teaspoon ground cinnamon
- ½ teaspoon allspice
- ½ teaspoon coriander
- ¼ teaspoon turmeric
Directions
At Home
- Open the cheesecake mix package and separate the mix from the included crust. If crust isn’t included, Dicentra recommends crushed cookies, such as vanilla wafers, as a substitute.
- In a plastic bag, combine the crust mix, ground ginger and crystallized ginger.
- In a second zip locking bag, combine the cheesecake mix, powdered milk and remaining spices.
In Camp
- Combine cheesecake mix with 1½ cups water.
- Stir to combine, breaking up any lumps, then set aside to firm up.
- Once set, top with crust mix.
8. S'mores Pizza
Still craving s’mores? Sometimes tradition can’t be beat. Let us twist it just a bit with this take on the campfire classic.
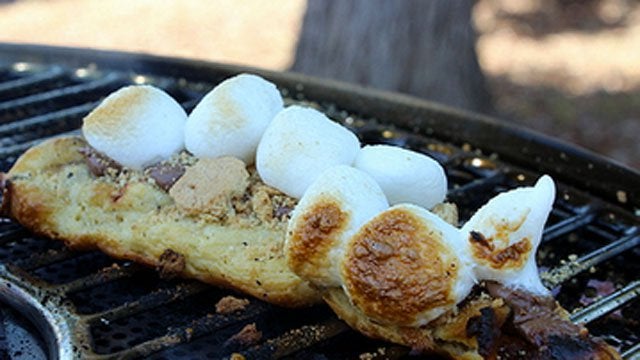
Ben Cote, “storyteller by nature” and owner of lends himself to minimalism and wants to provide “a truly simple way to make people’s lives better.” We’re happy to help him with both by showcasing his version of s’mores, pizza style. Discovered while at a friend’s pizza cook-off, he adapted the recipe for his Bio-lite backpacking stove’s grill accessory.
Ingredients
- Tube of crescent roll dough
- Chocolate sauce or Nutella
- Mini marshmallows
- Graham crackers
Directions
At Home
- Depending on how many servings you are making, pour enough chocolate sauce for the pizzas into a plastic bag.��
- Place graham crackers and marshmallows into a separate bag.
At Camp
- Start your fire or stove, both fitted with a grate or grill.
- Take the crescent roll dough out and throw it on the grill.
- Flip it over after a minute and spread on the chocolate from a snipped corner of the Ziploc bag.
- Next, crumble the graham cracker in your hands and sprinkle it over the chocolate sauce. Top it all off with several mini marshmallows and brown them by covering with tin foil. Cook for another 30 seconds to a minute and voila! you end up with magical slices of warm s’more heaven.
When packing the graham crackers, Ben says not to worry too much about it getting crushed in your bag. “That is part of the recipe,” he mentions. And if you don’t have a backpacking grill, no problem: “You can easily make this in a pan over an open fire.”